Creating a bootable USB drive sounds simple: download an ISO, copy it to a flash drive, and restart the computer. The important detail is that copying an ISO file like an ordinary document usually does not make the drive bootable. The image must be written correctly, or the tool must build the necessary partitions and boot loader.
USB media have largely replaced CDs and DVDs for operating-system installation, live environments, rescue systems, and technician toolkits. The real question today is not whether a tool can “put an ISO on USB,” but which tool fits the image format, firmware, security requirements, and workflow you actually need.
Four concepts to understand before you start
ISO is a common disk-image format used for operating-system installers and live environments. Many current Linux images are hybrid ISOs, meaning the same image can be used as optical media or written directly to a USB device.
UEFI is the firmware environment used by most modern PCs. Legacy BIOS describes the older boot model. Some systems still provide Compatibility Support Module options, but UEFI is the normal choice for current hardware.
GPT and MBR are partitioning schemes. They are not perfect synonyms for UEFI and BIOS, but modern Windows installations normally pair UEFI with GPT, while MBR is still common in older legacy configurations.
Secure Boot adds cryptographic verification to the boot chain. A multiboot tool can support UEFI while still requiring extra steps for Secure Boot on some systems.
Back up the USB drive first
Rufus, Fedora Media Writer, Etcher, Ventoy, YUMI, SARDU, and dd can repartition or overwrite the selected device. Copy anything important off the drive before you begin.
The most dangerous mistake is often not a bad ISO. It is selecting the wrong disk. Verify the device name, capacity, and model before clicking Start, Flash, Install, or running a raw-write command.
Verify the ISO before writing it
Most major operating-system projects publish a SHA-256 checksum alongside their images. Comparing the locally calculated hash with the official value can detect a corrupted or altered download.
On Windows PowerShell:
Get-FileHash .image.iso -Algorithm SHA256On GNU/Linux:
sha256sum image.isoIf the values do not match, download the image again from the official project. Switching from Rufus to Etcher or Ventoy cannot repair a corrupted ISO.
Rufus: the most flexible single-USB tool for Windows
Rufus is a small Windows utility with unusually deep control over bootable media creation. It is especially useful when you are writing one specific ISO and need control over partition layout, boot mode, or Windows-specific installation options.
Rufus supports Windows installers, many Linux distributions, UEFI images, and low-level diagnostic tools. When the image allows it, Rufus can explicitly target GPT/UEFI or MBR/BIOS environments.
Official download: rufus.ie/downloads. The official download page currently offers standard, portable, x86, and Arm64 builds.
For a custom Windows 11 installation USB created from a Windows PC, Rufus is one of the most flexible choices. If you want Microsoft’s standard installer with no additional customization, Microsoft’s own Media Creation Tool is even simpler.
Ventoy: keep multiple ISOs on one USB drive
Ventoy uses a different model from traditional imaging tools. You install Ventoy to the USB drive once, then normally copy ISO, WIM, IMG, VHD/VHDX, and EFI files onto its data partition.
When the computer boots from that drive, Ventoy builds a menu from the images it finds. For technicians carrying Windows installers, Linux distributions, SystemRescue, diagnostics, and recovery tools, this is much more convenient than recreating the USB every time.
Official download: ventoy.net/en/download.html. Ventoy publishes Windows and Linux packages, a LiveCD image, and SHA-256 hashes. The project explicitly recommends verifying the downloaded file.
Ventoy supports both UEFI and Legacy BIOS and includes Secure Boot support, but certain firmware implementations and individual ISOs may require additional steps. Test the drive on important systems before relying on it as your only recovery media.
balenaEtcher: simple, cross-platform image writing
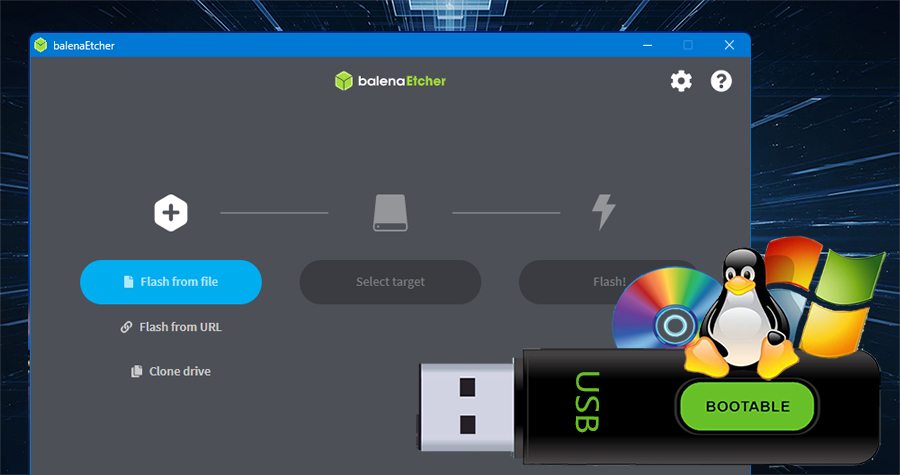
balenaEtcher deliberately keeps the workflow simple: choose an image, choose a target drive, and flash it.
It is an excellent choice for Linux images, Raspberry Pi operating systems, and other disk images that should be written directly. Etcher tries to hide system disks from the target list and validates the write afterward, which helps reduce common mistakes.
Official download: etcher.balena.io. The download page provides Windows, macOS Intel/Arm, and Linux builds. Official release assets are also available from balenaEtcher’s GitHub Releases page.
Etcher is not a multiboot tool and exposes fewer partitioning choices than Rufus. That simplicity is exactly what makes it useful when you just need to write an image correctly.
Fedora Media Writer: Fedora’s recommended media tool
Fedora Media Writer is maintained by the Fedora Project. It can download Fedora editions directly and write them to USB, and it can also write custom local images.
If your goal is to install Fedora, this is preferable to hunting for a random third-party utility. Fedora presents Media Writer as its recommended method for creating live installation media.
Official downloads:
- Windows: FedoraMediaWriter-win32-latest.exe
- macOS: FedoraMediaWriter-osx-latest.dmg
- Fedora Linux: official mediawriter package
Fedora also publishes checksums and OpenPGP signatures for its installation images. Image verification remains worthwhile even when Media Writer automates much of the download-and-write process.
Microsoft Media Creation Tool: the official Windows 11 option
If your only goal is a standard Windows 11 installer, Microsoft’s own tool is the most direct approach.
On the Download Windows 11 page, the Create Windows 11 Installation Media section provides MediaCreationTool.exe. The utility downloads Windows and prepares the USB drive automatically.
Official download: microsoft.com/software-download/windows11.
Microsoft requires a blank USB drive with at least 8 GB of space and warns that its existing contents will be deleted. This is the best choice when you simply want Microsoft’s standard Windows installation media.
YUMI: managed multiboot for Windows and Linux
YUMI has a long history as a multiboot USB creator. The currently recommended branch is YUMI Py, which runs on Windows and Linux and can maintain multiple operating systems, installers, and utilities on one drive.
Current YUMI builds can work with ISO/IMG/WIM/EFI/VHD(x) files, create persistence for compatible Linux distributions, and even test some installed content through virtualization.
Official download: pendrivelinux.com/yumi-multiboot-usb-creator. The page contains the current download buttons for YUMI Py on Windows/Linux and the supported YUMI exFAT alternative.
The old YUMI Legacy and YUMI UEFI branches are now archived. New deployments should use a currently maintained variant rather than following an outdated tutorial for those old builds.
SARDU: a more structured rescue toolkit
SARDU MultiBoot Creator is built around creating organized rescue media containing antivirus systems, Linux distributions, Windows PE environments, installers, and diagnostic tools.
It makes sense when you want a categorized technician toolkit rather than simply copying a folder full of ISO images.
Official download: sarducd.it/downloads. The project publishes Windows and GNU/Linux builds and separates features between free and PRO licenses; some UEFI capabilities and commercial-use features depend on the selected license.
dd: raw image writing from Linux or macOS
On Unix-like systems, many hybrid images can be written directly from a terminal with dd. On GNU/Linux, dd is part of GNU Coreutils and is normally already installed.
A conceptual example is:
sudo dd if=image.iso of=/dev/sdX bs=4M status=progress conv=fsyncDo not copy that command blindly. Replacing /dev/sdX with the wrong device can overwrite the system SSD or another important disk. A graphical tool such as Etcher is safer for users who are not comfortable identifying block devices.
Official documentation: GNU Coreutils — dd. There is normally no separate download for dd because it is part of the base utility set.
Which tool should you use?
| Use case | Recommended option |
|---|---|
| Single Windows or Linux USB from Windows with advanced controls | Rufus |
| Multiple ISOs on one drive | Ventoy or YUMI |
| Simple image writing with minimal decisions | balenaEtcher |
| Fedora installation media | Fedora Media Writer |
| Official Windows 11 installation USB | Microsoft Media Creation Tool |
| Organized rescue and diagnostic toolkit | SARDU |
| Direct raw writing from Linux/macOS terminal | dd |
UEFI, GPT, MBR, and Secure Boot: do not choose randomly
For a modern 64-bit PC, UEFI + GPT is normally the starting point. Legacy/CSM should be reserved for older hardware or software that genuinely requires it.
Rufus can expose those choices explicitly. Etcher and dd instead write the layout already contained in the image. Ventoy and YUMI use their own multiboot loaders.
Secure Boot adds another layer. Some images are signed and boot directly; others may require enrolling a key, using a tool-specific process, or temporarily changing firmware settings. Do not permanently disable a security feature without understanding why it is necessary.
Multiboot versus a dedicated USB
For a technician, a high-capacity Ventoy or YUMI drive can replace a bag full of flash drives. Windows installers, Ubuntu, Fedora, SystemRescue, and diagnostic tools can all live on one device.
A dedicated USB still has advantages. Firmware updates, critical server installs, and vendor-specific recovery procedures are often more predictable when you follow the exact method recommended by the vendor.
There is nothing contradictory about carrying one well-tested multiboot drive and keeping one or two dedicated drives for high-risk or vendor-specific tasks.
Not every ISO should be written the same way
Many modern Linux distributions publish hybrid images designed for direct writing. Other images expect the USB creation tool to prepare files, partitions, or a specific boot loader.
If an ISO does not boot after being written correctly, check the documentation from the project that published the image before randomly changing partition schemes or converting formats.
Test the USB before you need it
A recovery drive that has never been booted is only a promise. After creating it, verify that the target firmware sees the USB, that the expected menu appears, and that the important operating system or rescue image begins loading.
For multiboot kits, test the images you rely on most. A new ISO, firmware update, or Secure Boot change can behave differently from a previous release.
Bootable media guides
Universo Digital is reviewing these tools individually. We already have a dedicated balenaEtcher guide, and additional tools will appear here as their articles are updated or translated.