This article preserves the complete installation workflow for Proxmox Virtual Environment 7.4. Version 7.4 was released on March 23, 2023 and was the final minor branch of the Proxmox VE 7 generation.
The guide remains useful for labs, legacy-system recovery, historical documentation, and reproducing older environments. The screenshots below are the original images taken from a real Proxmox VE 7.4 installation. We are intentionally keeping them instead of replacing them with Proxmox 9 screenshots because they document the interface being discussed.
For the current platform, see our updated introduction to Proxmox VE 9.2.
What Proxmox VE 7.4 was
Proxmox VE 7.4 was based on Debian 11.6 “Bullseye”. It used Linux 5.15 by default, with Linux 6.2 available as an optional kernel, and included QEMU 7.2, LXC 5.0.2, ZFS 2.1.9, Ceph Quincy 17.2.5, and Ceph Pacific 16.2.11.
Notable changes at the time included the integrated Proxmox Dark theme, improved Ceph information in the web UI, downloadable task logs, resource-tree sorting, and changes to the Cluster Resource Scheduler.
The original announcement remains available from Proxmox VE 7.4 release information.
Support status: read this before installing
Proxmox VE 7 has been end-of-life since July 2024. This article should therefore not be interpreted as a recommendation to deploy a new 7.4 production hypervisor today.
Installing it can still make sense in an isolated lab, when recovering an old host, when reproducing a legacy environment, or when preparing an upgrade path from an old backup. An unsupported hypervisor should not be treated as a normal Internet-facing production system.
Download the official Proxmox VE 7.4 ISO
Proxmox still hosts the historical 7.4-1 installer on its official infrastructure.
File: proxmox-ve_7.4-1.iso
Size: about 1.05 GB
SHA-256:
55b672c4b0d2bdcbff9910eea43df3b269aaab3f23e7a1df18b82d92eb995916Official download: Proxmox VE 7.4-1 ISO
Verify the SHA-256 checksum after downloading so you know the image matches the copy published by Proxmox.
Prepare the installation media
The Proxmox VE 7.4 installer is a hybrid ISO. It can be burned to optical media or written directly to a USB flash drive. Proxmox recommended USB because it is normally faster.
On Windows, balenaEtcher or another proper image-writing utility can be used. On GNU/Linux, the 7.4 documentation showed direct writing with dd. Simply copying the ISO file to a USB filesystem does not create the expected boot media.
Proxmox’s 7.4 documentation also specifically warned against using UNetbootin with the installer image.
Hardware and preparation
It is useful to separate evaluation minimums from realistic resources for running guests.
The 7.4 administration guide listed a 64-bit CPU, 1 GB of RAM for Proxmox itself plus guest memory, storage, and one NIC as evaluation minimums. Intel VT-x or AMD-V support was required for KVM full virtualization.
In practical use, 2 GB leaves almost no room for workloads and 4 GB is still very limited for a virtualization host. Size memory according to the actual guests you intend to run.
Before starting:
- enable Intel VT-x/VT-d or AMD-V/AMD-Vi when required by your workloads;
- make sure the selected system disk can be erased;
- plan a static management IP, gateway, DNS server, and FQDN;
- use UEFI when it is the appropriate boot mode for your hardware;
- keep server firmware and storage configuration in a known, stable state.
Do not disable CPU C-states as a generic performance tweak. That recommendation appeared in many older virtualization guides, but it increases power consumption and does not automatically improve every workload. Change power-management settings only when measurements and a specific technical problem justify it.
1. Boot from the USB drive or DVD
Connect the installation media and select it from the server’s boot menu. A successful boot displays the Proxmox VE 7.4 installer menu.
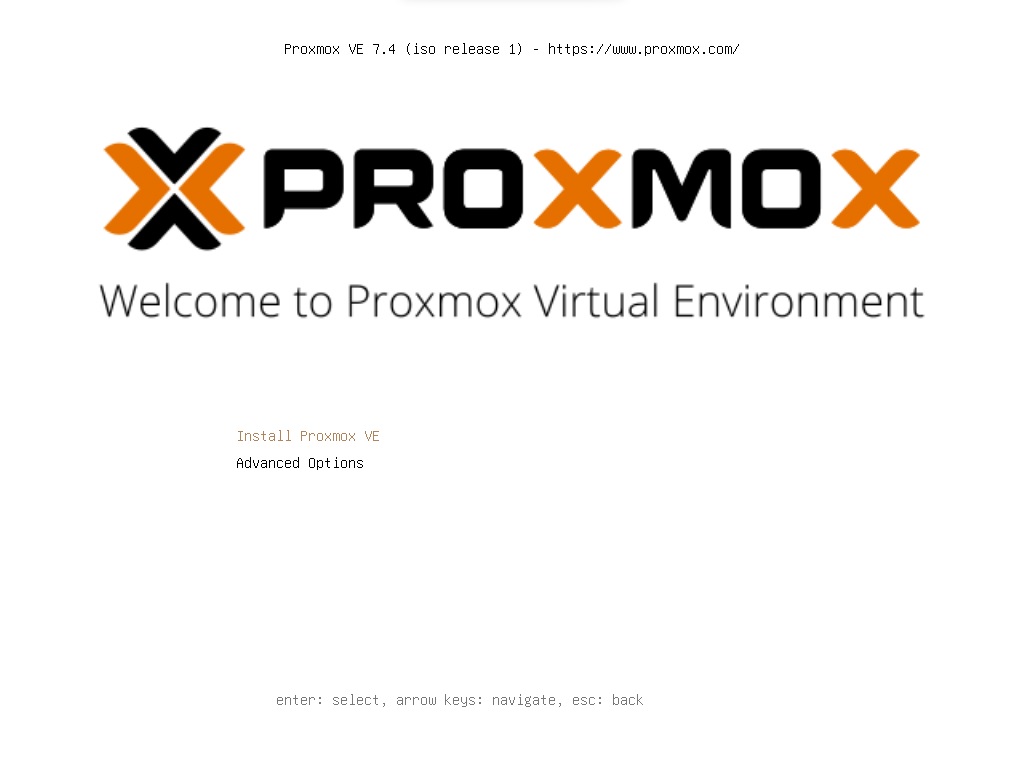
For a standard installation, choose Install Proxmox VE.
2. Accept the license
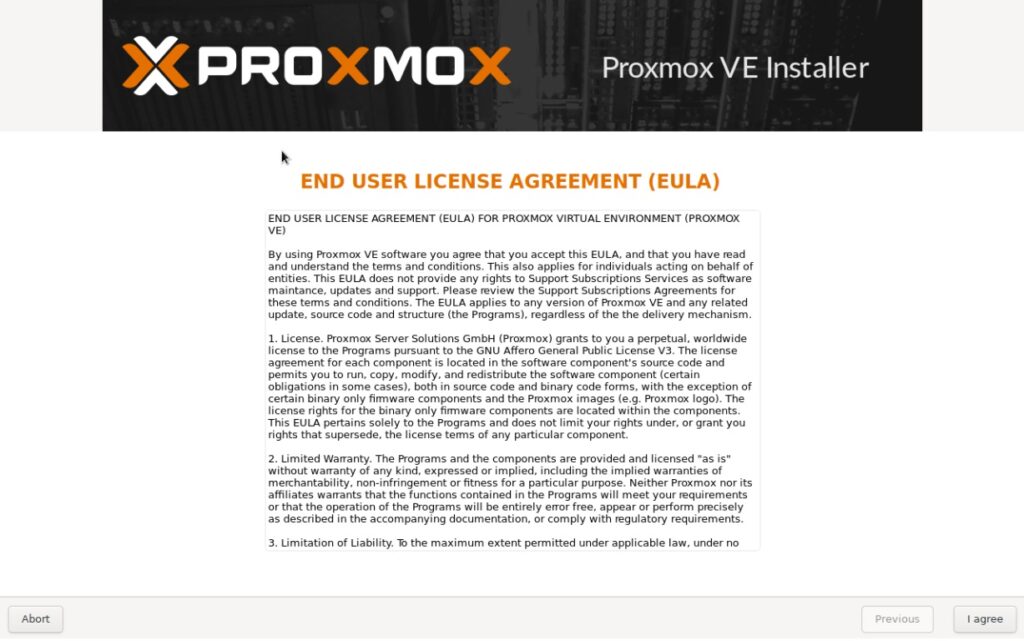
Review the license and select I agree to continue.
3. Select the target disk
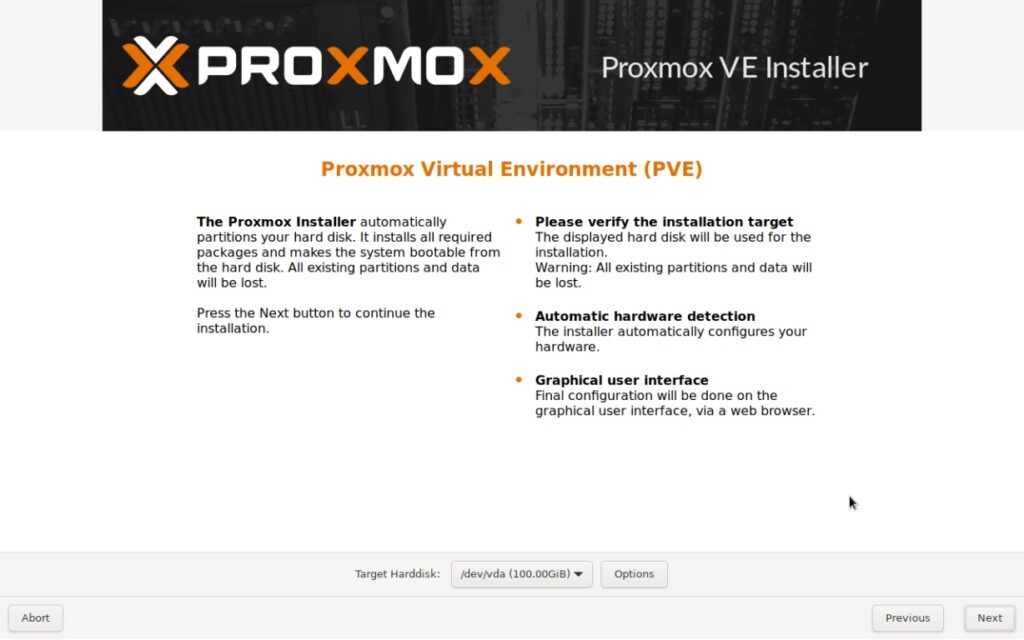
The selected disk will be erased. On a server with several disks, verify model and capacity carefully rather than trusting device order alone.
4. Advanced storage options
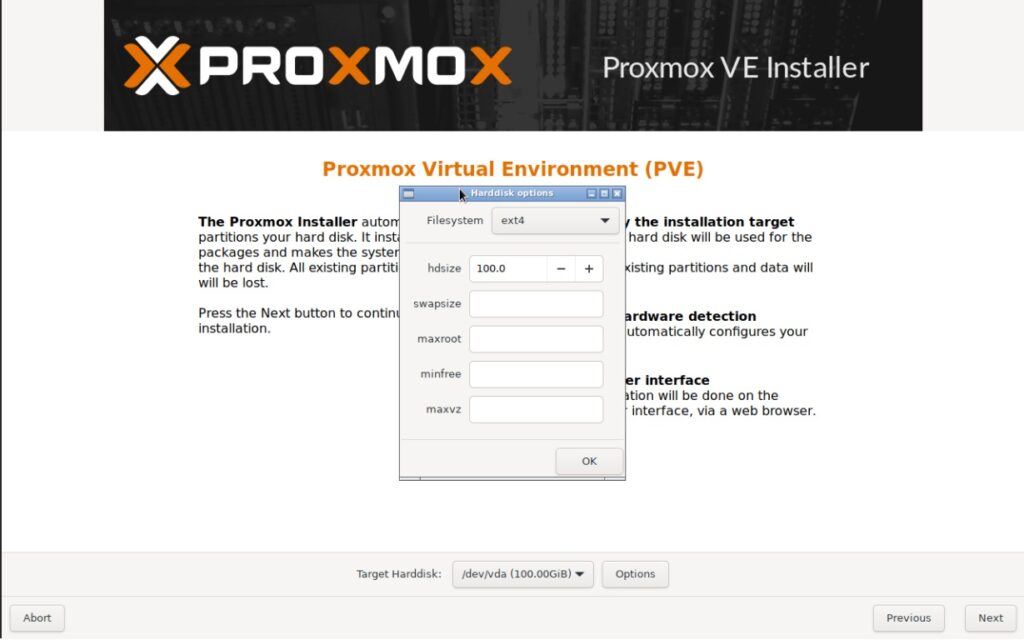
For a simple lab installation, the defaults may be appropriate. Production systems should plan storage in advance because LVM-Thin, ZFS, separate guest disks, and shared storage lead to very different designs.
5. Country, time zone, and keyboard
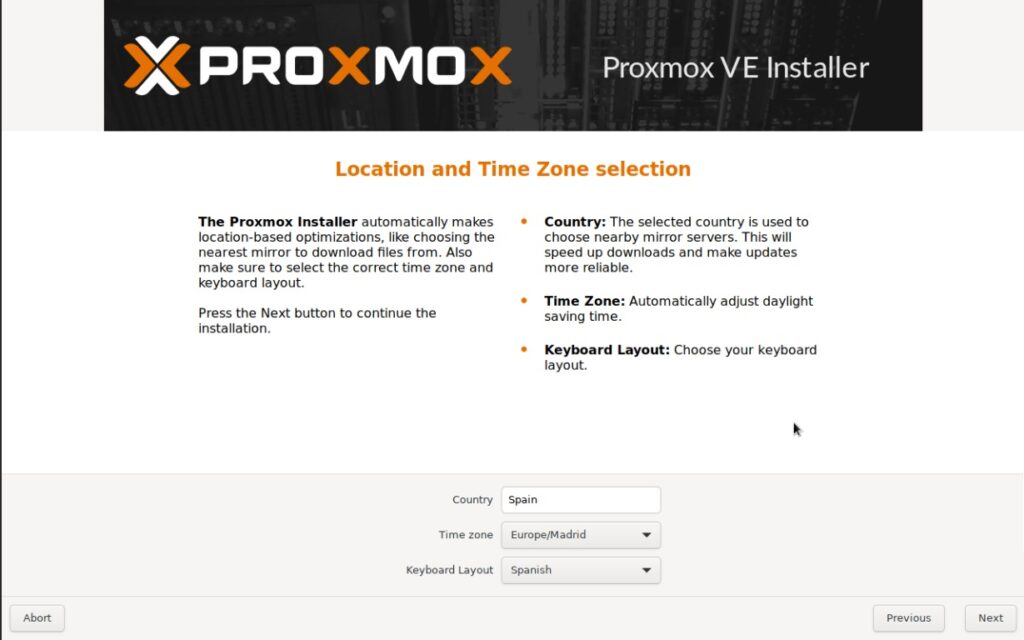
Correct time configuration matters for logs, scheduled jobs, certificates, clusters, and troubleshooting.
6. Root password and administrator email
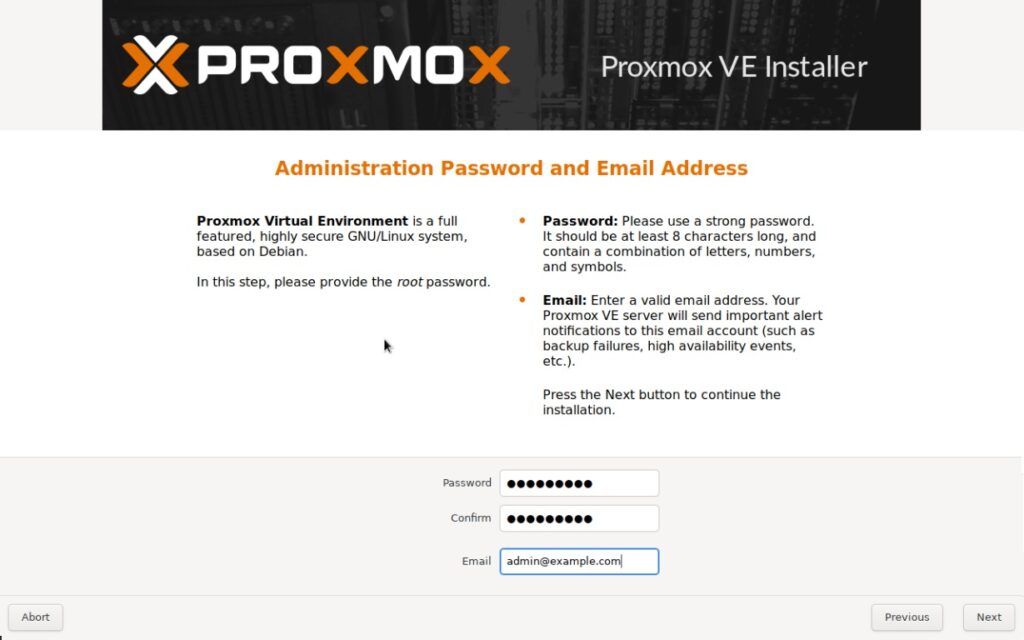
Use a long, unique password. After installation, a real environment should normally use named administrative accounts, roles, and multi-factor authentication rather than relying on root@pam for every daily task.
The administrator email should also be a monitored address because it can be used for system alerts.
7. Configure the management network
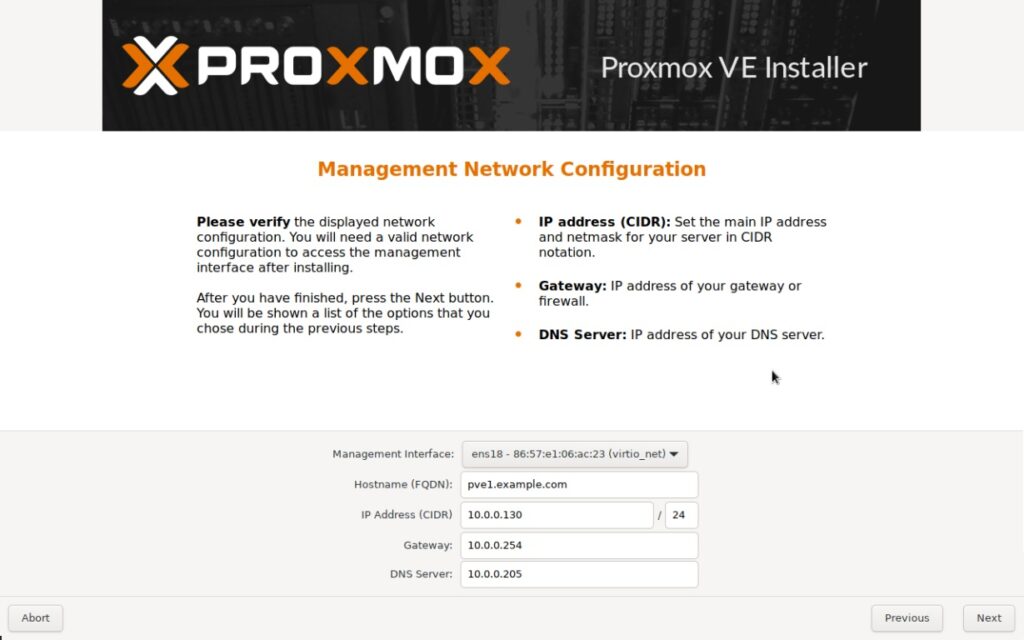
Configure:
- Hostname/FQDN: a resolvable name such as
pve01.example.local; - IP Address: a static address with CIDR prefix;
- Gateway: the network gateway;
- DNS Server: the resolver used by the host.
A virtualization host should have a predictable management address. Changing hostnames or addresses casually after cluster creation can create unnecessary complexity.
8. Review the installation summary
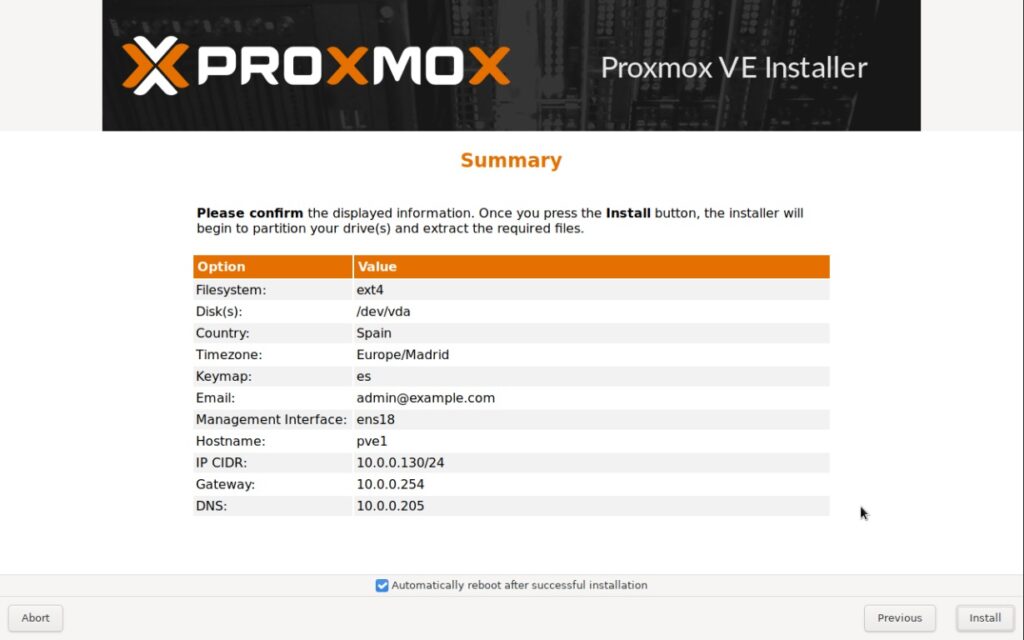
Check the target disk, network, time zone, and other values. Use Previous if anything needs correction.
9. Install the system
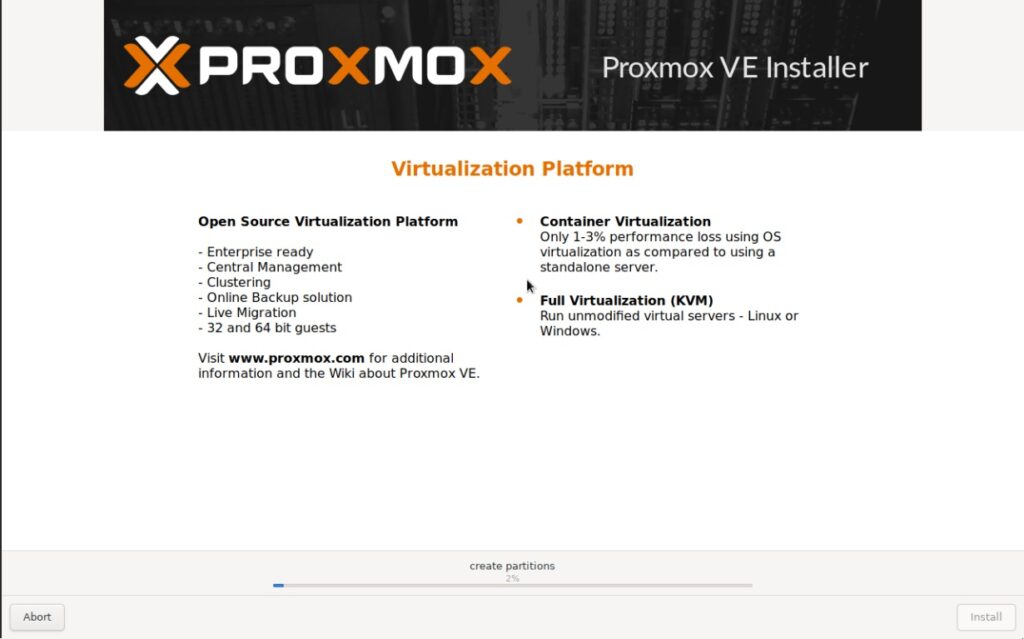
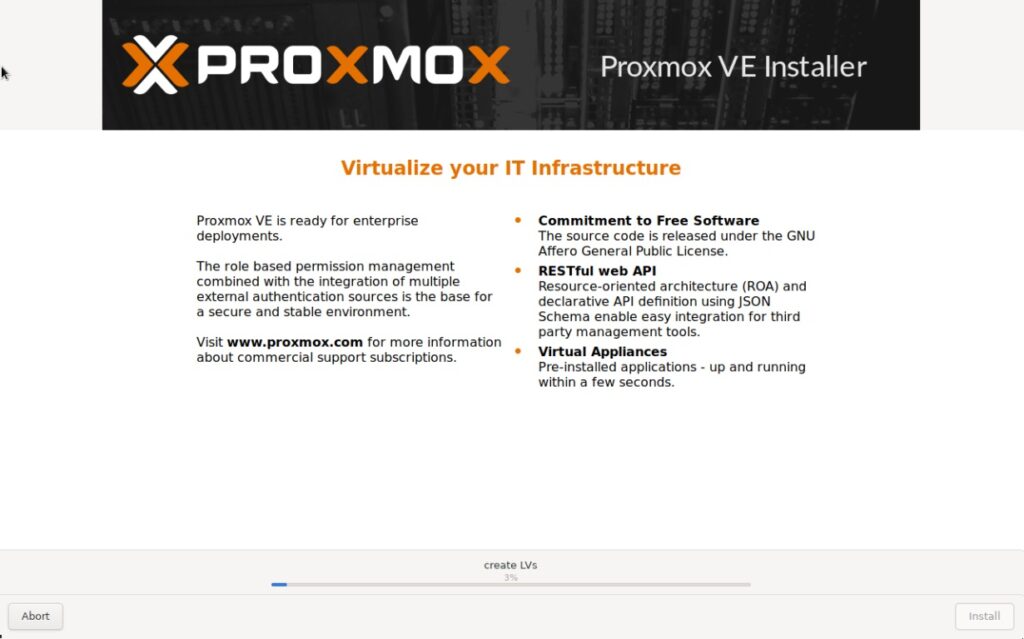
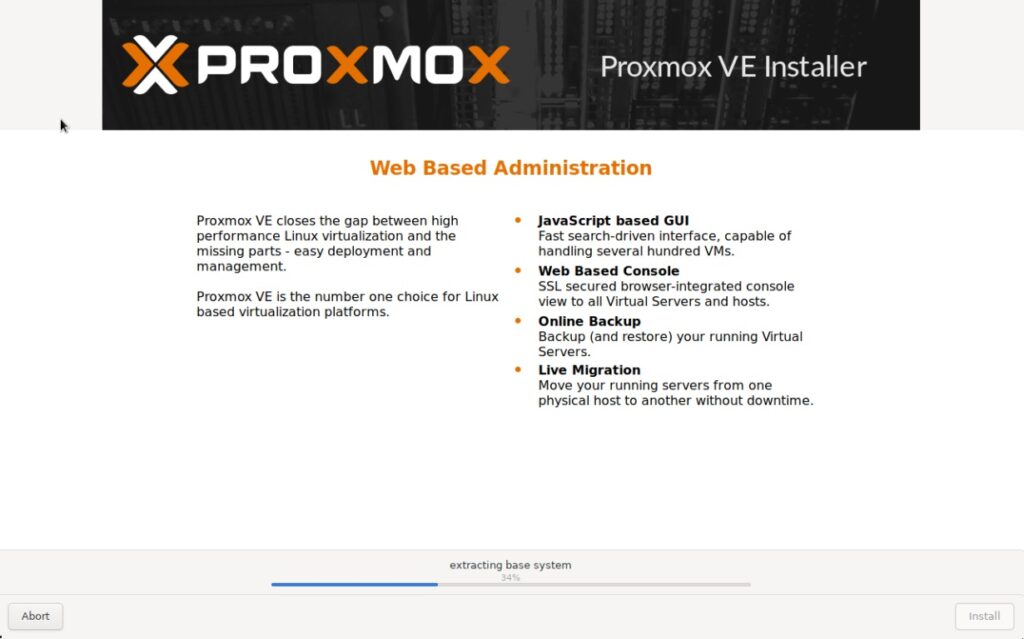
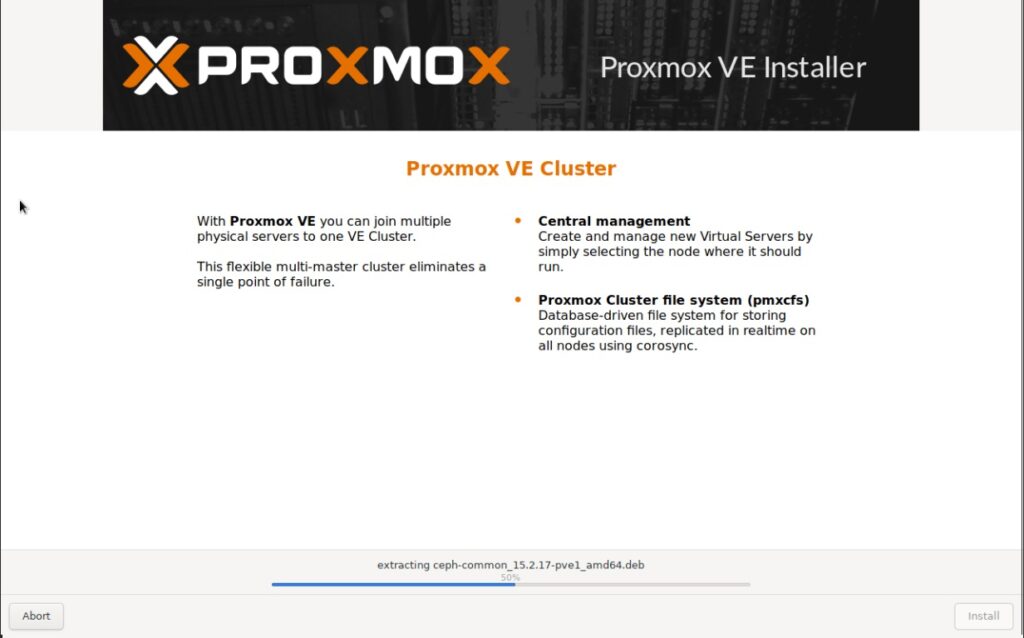
Installation time depends mainly on server hardware and storage performance.
10. Installation complete
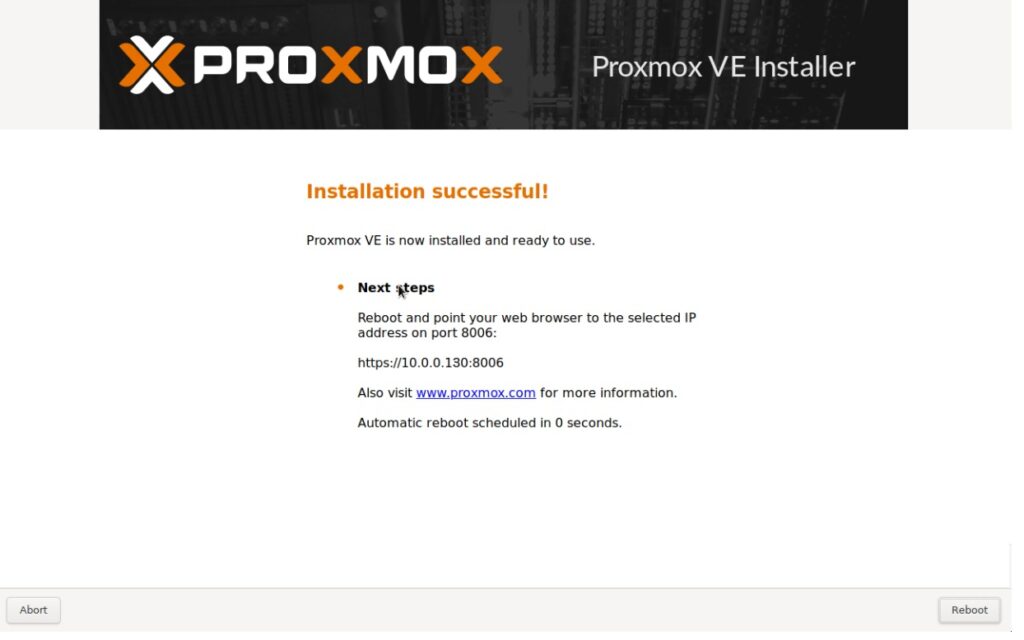
Remove the installer media if required and reboot into the newly installed system.
11. GRUB and first boot
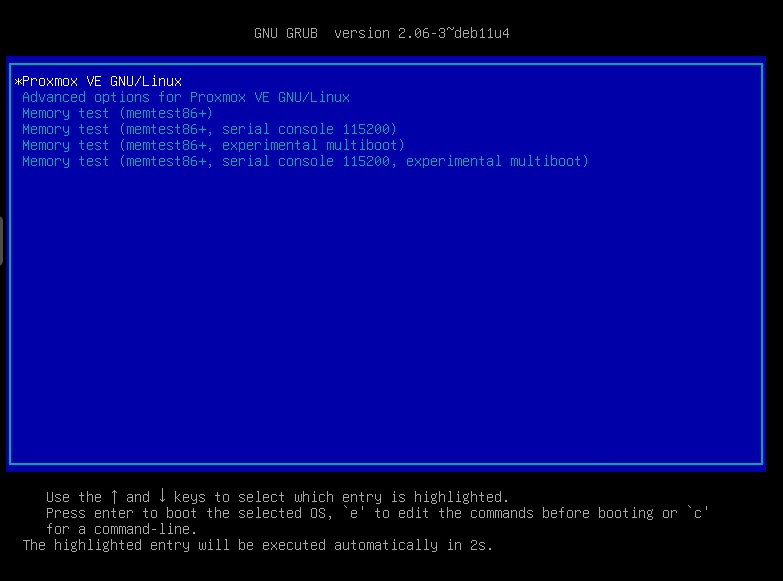
For a normal boot, let the default entry continue. Advanced GRUB entries are mainly useful for recovery or selecting a different installed kernel.
12. Local console and management URL
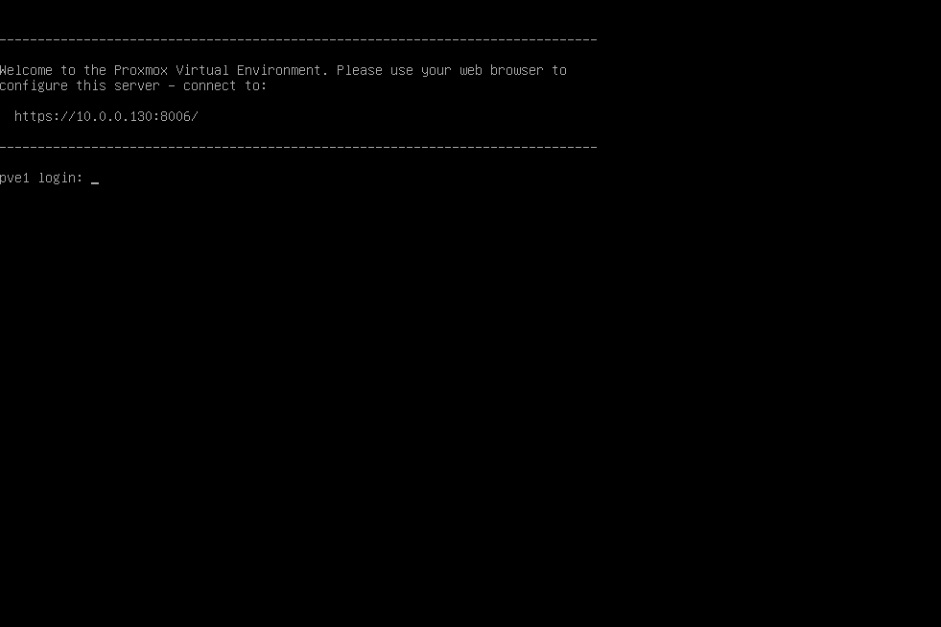
The web interface listens on HTTPS port 8006 by default:
https://SERVER_IP:8006Access it from a trusted management network. Do not expose port 8006 directly to the Internet as a routine remote-management method; use a VPN or another properly designed secure access path.
13. Open the web interface

Enter the full URL in Firefox, Chrome, Edge, or another current browser.
14. The self-signed certificate warning
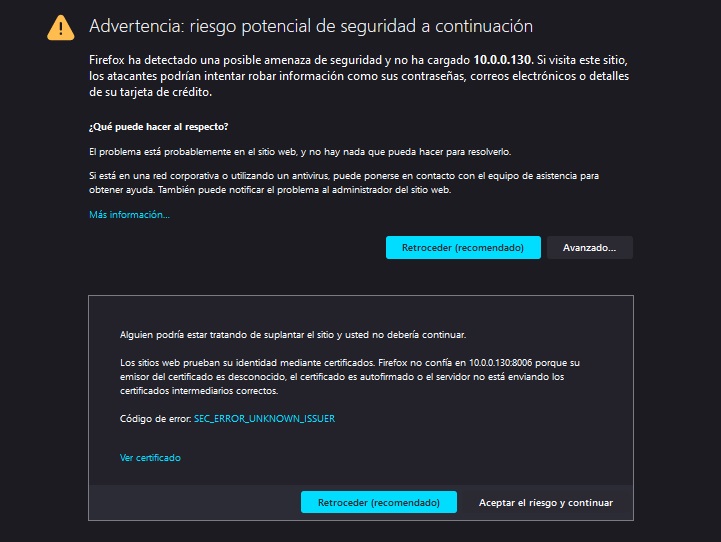
A certificate warning is expected on a fresh installation because Proxmox initially generates its own certificate. Do not make a habit of ignoring TLS warnings without verification. Confirm that the IP belongs to the host you just installed and that you are connected through the intended trusted network before continuing.
A trusted certificate can be installed later, including through ACME/Let’s Encrypt where appropriate.
15. First login
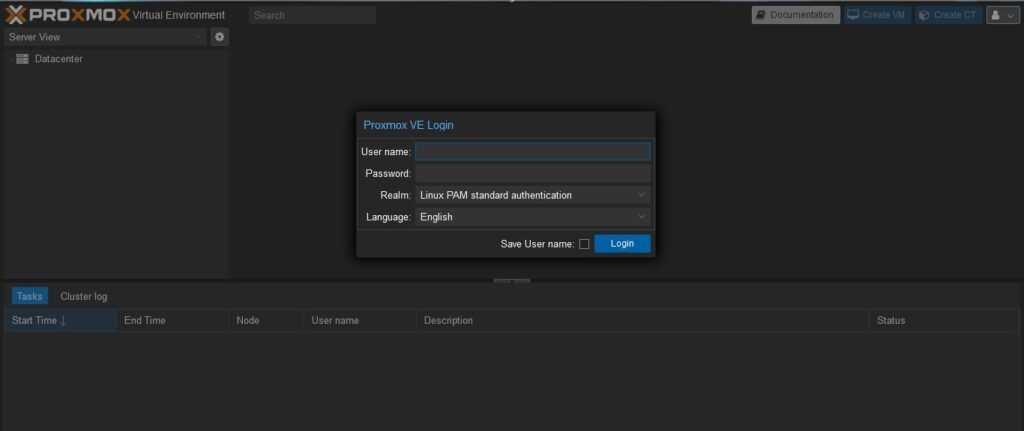
The initial login is normally:
User: root
Realm: Linux PAM standard authentication
Password: the password chosen during installation
After logging in, review updates, repositories, storage, networking, time synchronization, DNS, and your administrative-account strategy.
16. Subscription notice
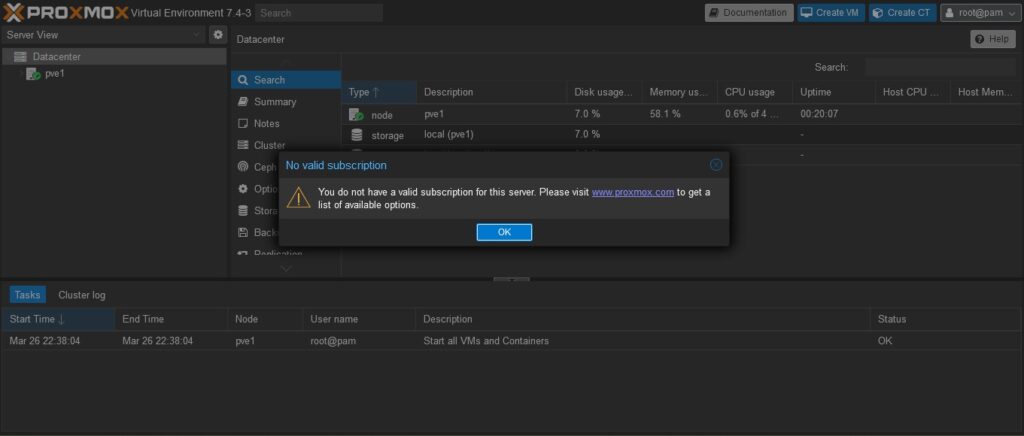
Proxmox VE can be used without a commercial subscription. A subscription provides access to the Enterprise repository and, depending on the plan, professional support.
For an unsubscribed 7.4 lab, the historical pve-no-subscription repository could be configured. Do not mix package repositories from different Proxmox generations, and do not blindly apply current Proxmox 9 repository instructions to a 7.4 host.
17. Proxmox VE 7.4 management interface
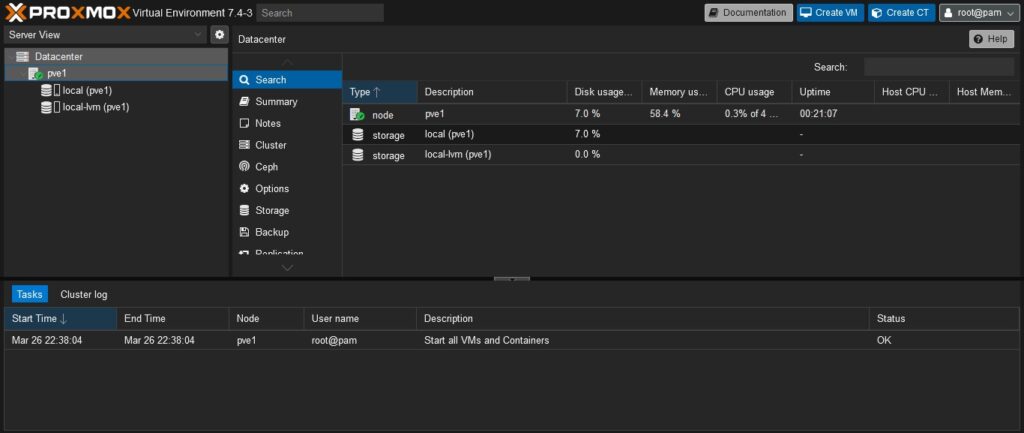
The node is now installed and ready for additional storage, networking, user accounts, backups, templates, virtual machines, and LXC containers.
If you need to recover a 7.4 host today
If you are installing 7.4 because an old infrastructure must be recovered, treat that state as temporary rather than as the final production target.
A safer migration workflow is:
- restore or install 7.4 on an isolated management network;
- recover the configuration or workloads you need;
- bring the 7.4 branch to its final compatible package state where the required repositories remain available;
- verify independent backups;
- follow Proxmox’s documented major-version upgrade paths in sequence;
- end on a currently supported Proxmox VE release.
Do not skip major-version upgrade requirements without reading the corresponding upgrade guides and running the pre-upgrade checks Proxmox provides.
Proxmox VE 7.4 versus current Proxmox VE
The product is still recognizable: KVM, LXC, web management, storage, clustering, and backup remain central. But Debian, kernels, QEMU, LXC, ZFS, Ceph, SDN, HA, the installer, security features, and many administrative workflows have changed significantly since 7.4.
That is why these screenshots are valuable historical documentation but should not be used to claim that a current Proxmox VE 9.2 installation looks exactly the same.
Continue learning
For current deployments, use the supported Proxmox VE documentation and our current Proxmox VE 9.2 overview.
Historical tutorials in the same series include:
- Create a virtual machine in Proxmox VE step by step
- Create an LXC container in Proxmox VE step by step