In this guide, we are going to see how to create a Virtual Machine (VM) using VirtualBox to install GNU Linux Ubuntu on it. Building on the previous article (Installing VirtualBox on Microsoft Windows).
Creating a VM for GNU Linux Ubuntu step by step.
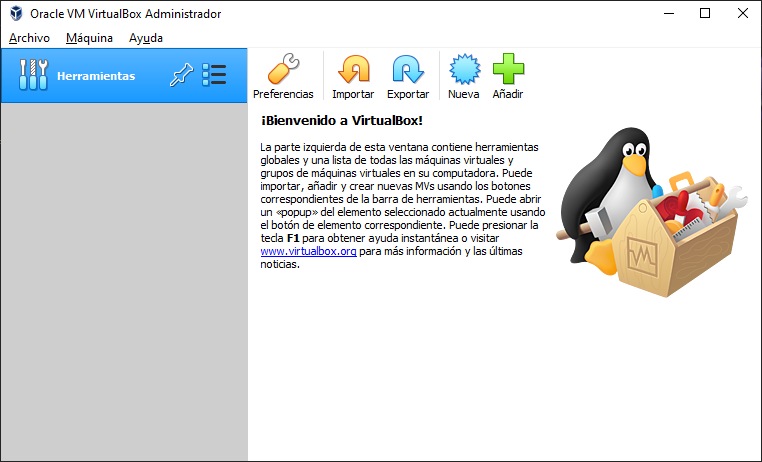
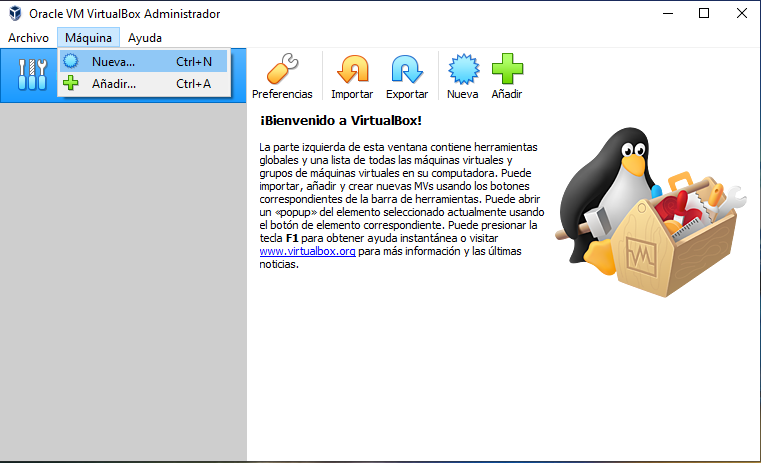
We start by opening the VirtualBox as shown in the previous image. To create the MV, we can use several ways. In this tutorial we will do it from the machine menu as shown in the image below:
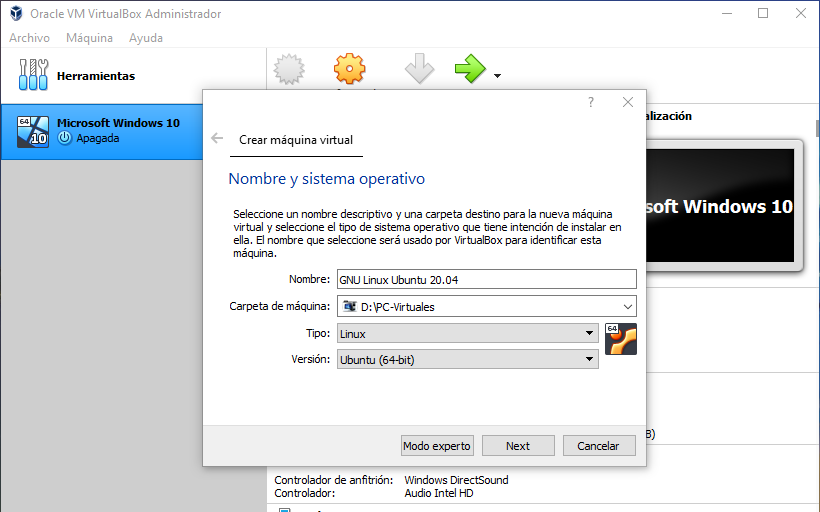
Once the option is selected, a window will be displayed in which the identifying name for the virtual machine and the location where it will be saved (its files) will be specified. In this same window, we will choose the type of operating system that we are going to virtualize. In our case, we select “Linux” and the “Ubuntu 64-bit” version. If you have the 32-bit operating system installed, we can create the 32-bit machine. After selecting 32-bit, everything should look like the image shown below.
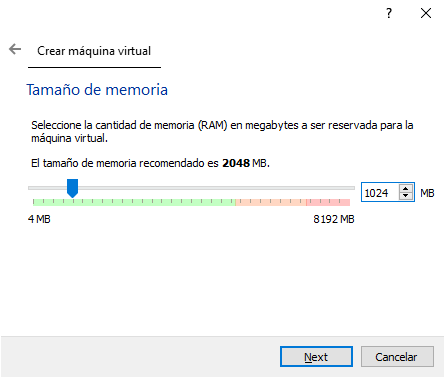
After clicking on “Next”, the window appears to select how much RAM on our PC we want to assign to the VM. In our case, 1 Gigabytes (1024 Megabytes) were assigned, although depending on how many gigs of RAM your PC has, more could be assigned.
The next step is to create the hard drive of our virtual machine, and we proceed as shown in the following image.
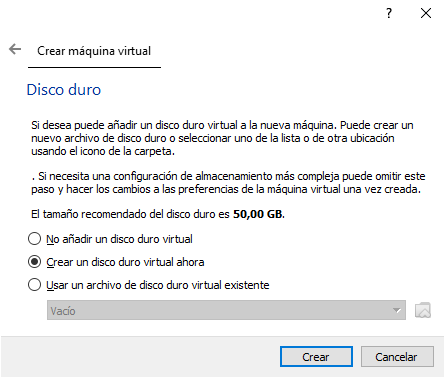
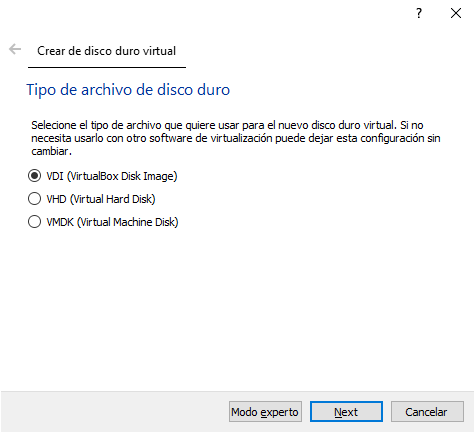
To create a hard drive, we have various formats available in case we want to export the VM to other virtualization software. In this case, we will select the first option.
Next, we are going to select how we want to store the hard drive of the virtual machine. There are the two options shown in the image, you can read the explanation of both options and select the one that best suits you. In our example case, we will use the first option to be a little more conservative with our PC space.

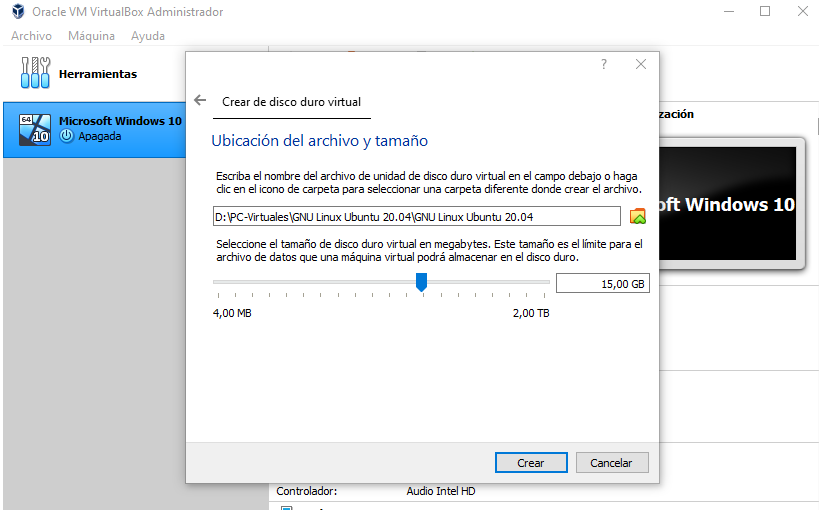
To conclude with the creation of the VM hard drive, in this window we will specify in which location we want it to be saved. We can leave the location that appears by default or select another. We are also going to decide how much space that hard drive will have to store data (keep in mind that the location where you are going to save it has that free space). In our case, we will set a size of 15 Giga Bytes
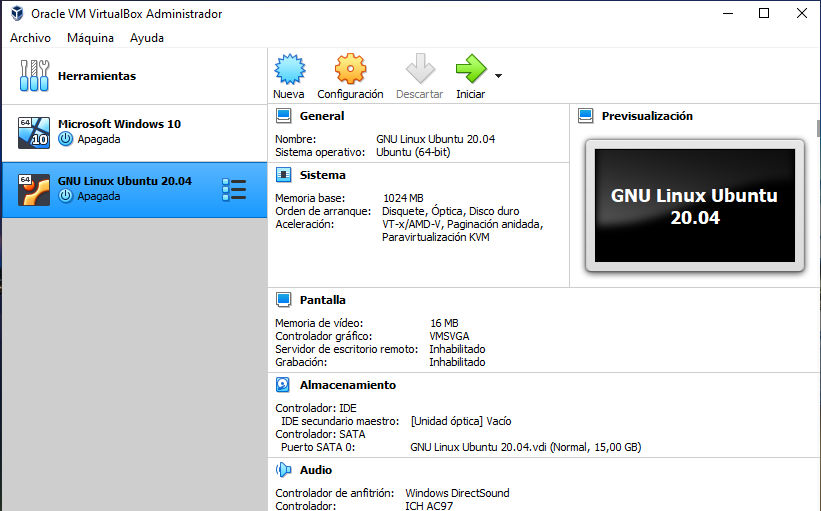
Once we click the Create button in the previous image, our virtual machine is already created.
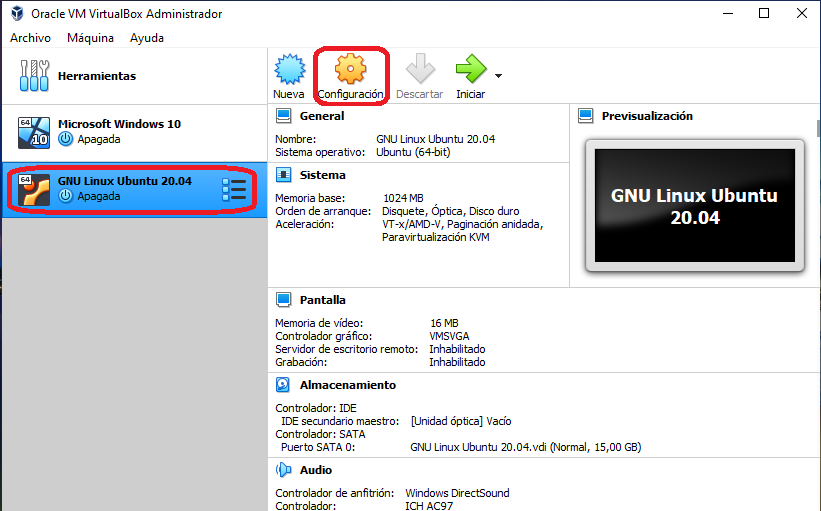
Before starting to use the newly created virtual machine, we are going to make some adjustments and show some configuration options that can be very useful to us. To make changes to the configuration of the virtual machine, we are going to select it in the list and click on the Configuration button, as shown in the image below.
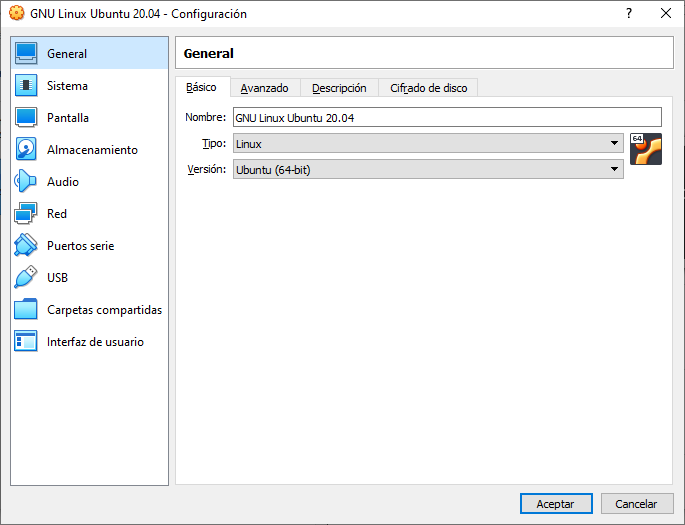
Once the Configuration button is pressed, a window like the one shown in the following image will appear. In this window, we can change all the parameters used when the virtual machine was created and many others.
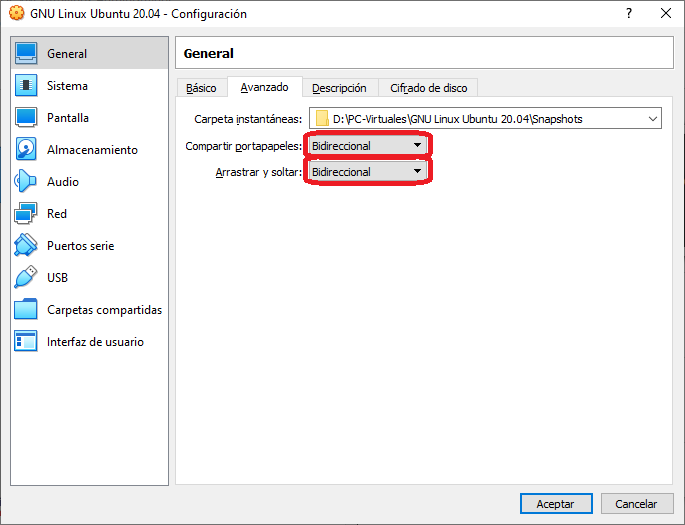
Among the first settings we will make, we are going to enable the option to share the clipboard and enable drag and drop. In both options, we are going to choose the “Bidirectional” value. This allows us to copy things on our PC and paste them into the VM, as well as drag content. It should be as shown in the image.
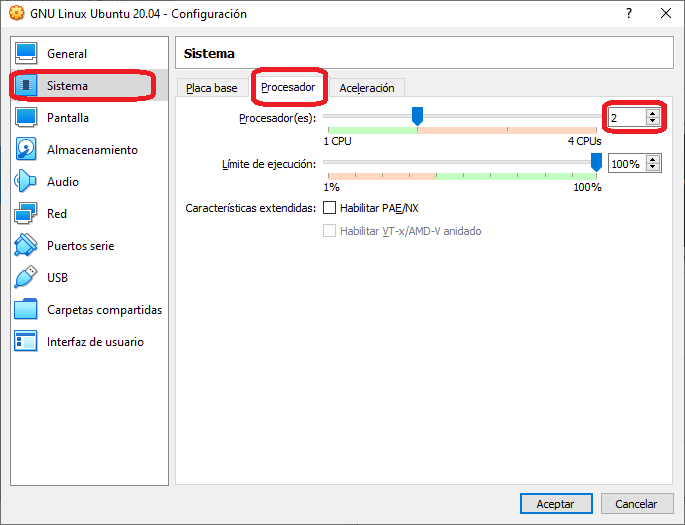
Next, we are going to adjust the number of cores that the virtual machine processor will have. It is very important to know that this value depends on the number of cores that our real processor has, that is, the one that the real machine has physically installed. In our case, we will assign 2 cores to the virtual machine microprocessor, as shown in the following image.
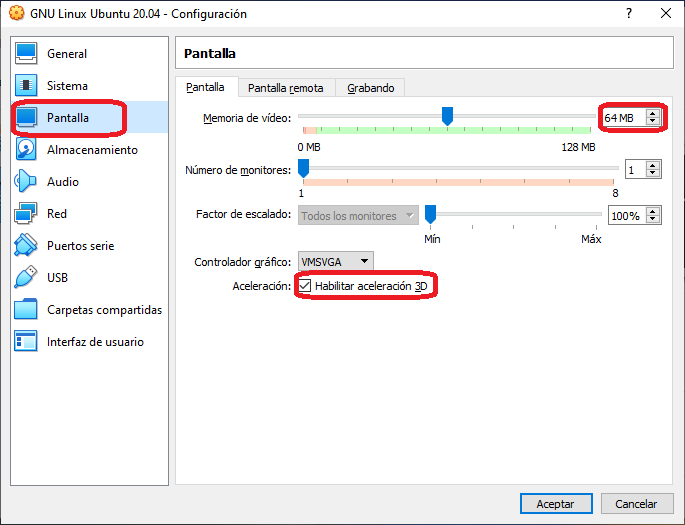
Among the changes to be made, we are going to improve the video configuration of our virtual machine. To do this, we are going to specify how many megabytes of video it will have. We are also going to allow 3D acceleration to be used in our virtual machine. The changed parameters should look like the following image.
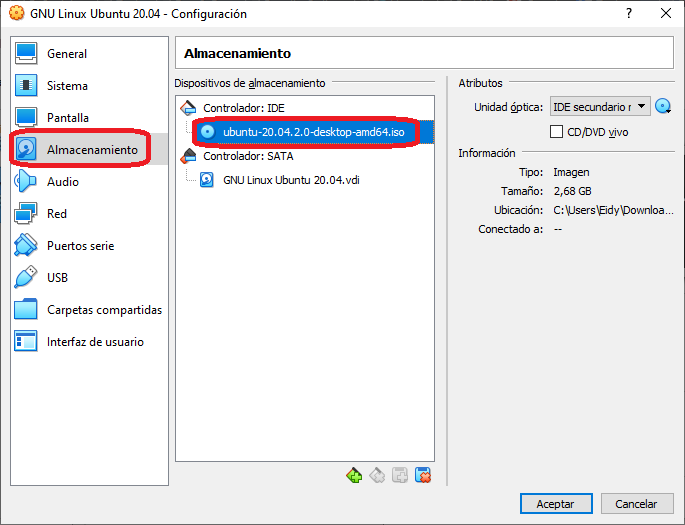
Another essential adjustment is to select the installation media, which in these cases we will use CD or DVD images in .ISO files, which is the most standardized format. As shown in the image of the Configuration window, we select Storage and there is the CD drive of the virtual machine. In the CD icon, we will select the ISO file to use that we must have previously downloaded, or we can do this step later.
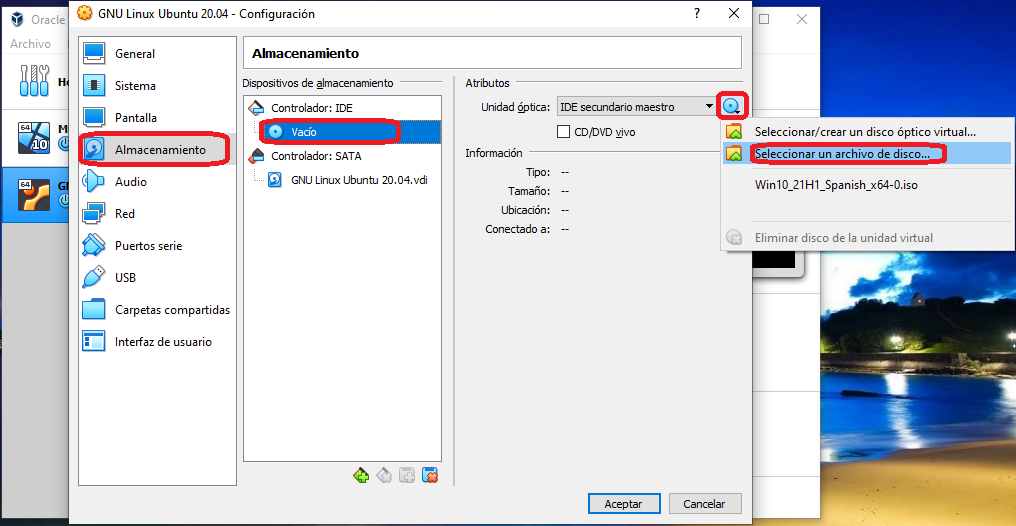
Once you click on the Select a disk file option. A dialog box will appear in which we will search and select the ISO file to use to install the virtual machine.
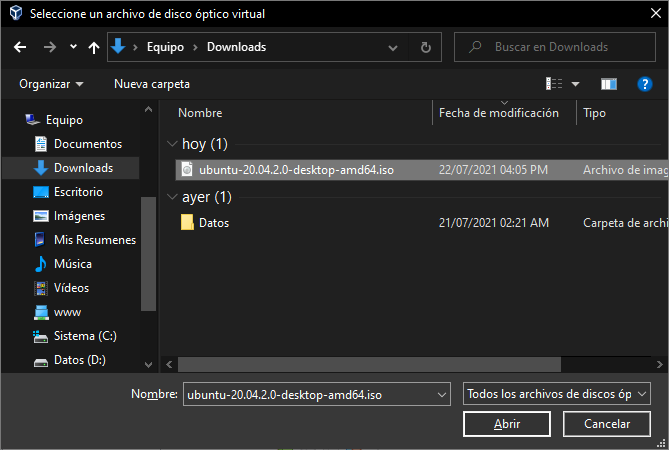
Once the corresponding ISO file has been selected, it should look like the image shown below
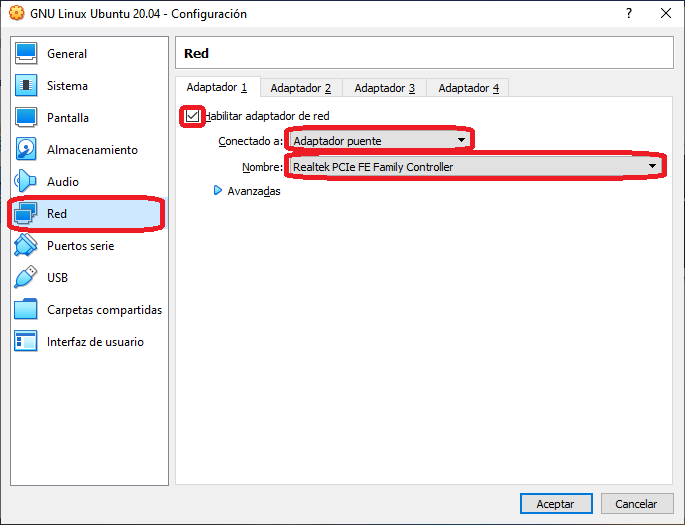
Another adjustment that we will make will be to specify the network configuration that the virtual machine will have. VirtualBox has several ways to configure the network, in another article we will see each of the variants and their possibilities. In this case, we are only going to put a network card in the virtual machine and specify that it will work as a bridge adapter. It is important that below we choose the name of our network adapter that is connected to the network. In the event that we do not have a network, we can select the “Host-only adapter” option, which is a virtual network adapter created by VirtualBox. Continuing with the tutorial, we will continue as shown in the image.
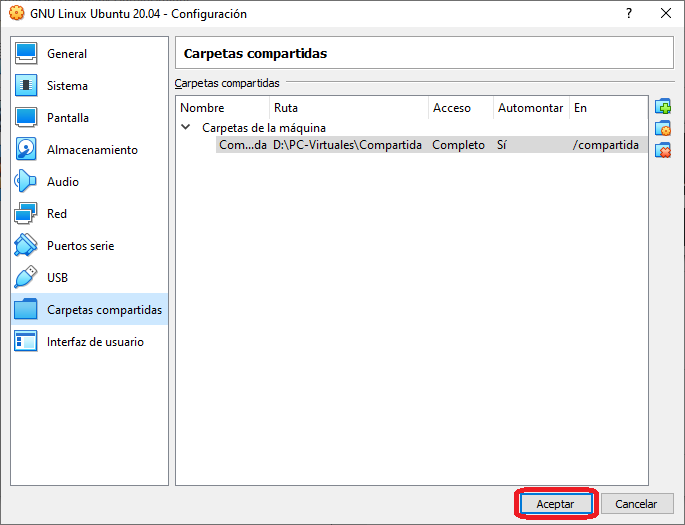
Another adjustment that we are going to make is to add a shared folder so that it is accessible from the virtual machine. For that, we go to the “Shared Folders” option and click on the folder icon with the + sign. In the window that appears, We fill in the corresponding data.

We can add as many shared folders as we want, once added they should look like the following image.
That’s it for the virtual machine configuration settings. As you may have noticed, there are many more that you will discover little by little in the VirtualBox tool.
Power on the virtual machine
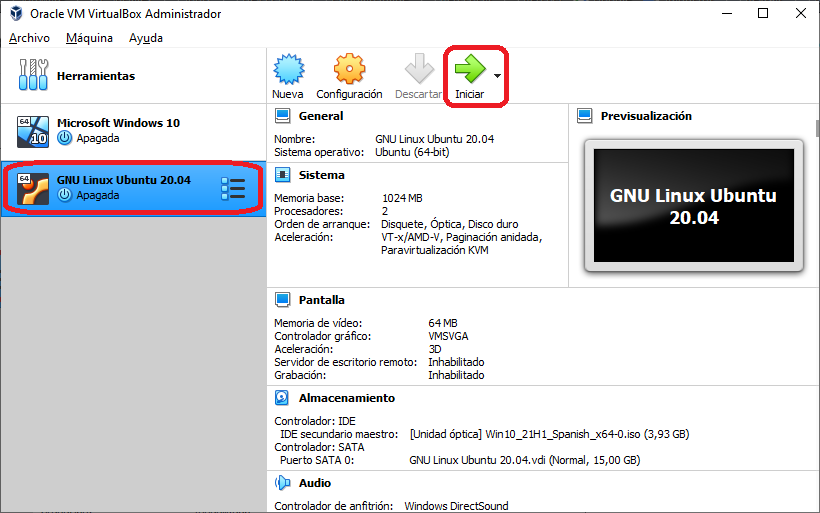
After making the settings, we are going to proceed to turn on the virtual machine. To do this we select the machine in the VirtualBox list and click on the green arrow icon that says Start to turn it on.
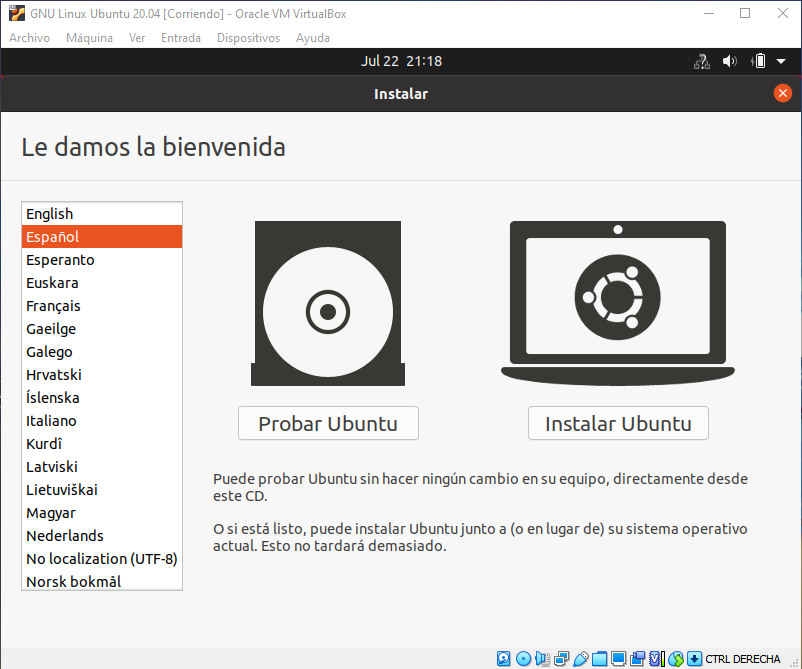
Once the virtual machine is powered on, a new window will appear like the one shown below. This window will be the control interface to interact with the virtual machine. In it, we will see a menu bar, which we will display below so that you can quickly see the options we have available.
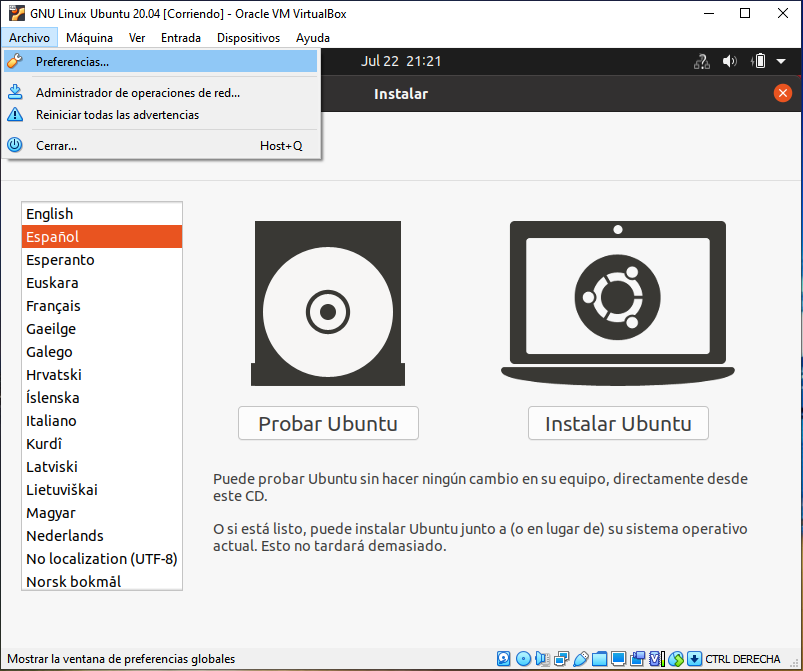
File Menu in the Virtual Machine Window, from this menu you can access the general VirtualBox configuration window. If we want to leave, we can access the last option.
Very Important : whenever the hotkey combination Host+Letter appears on the right side of a menu. It refers to pressing the key (Right Control) + the corresponding letter.
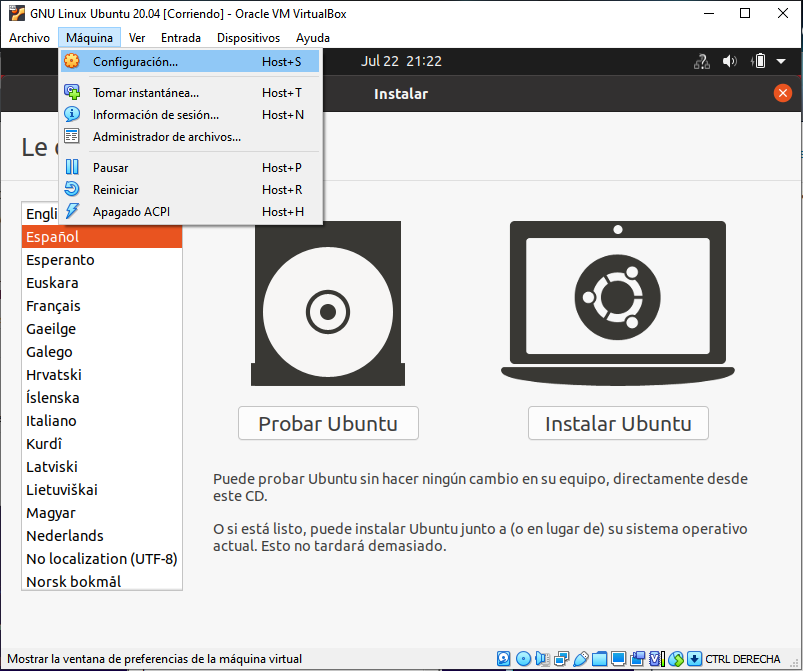
The Machine menu is related to specific options about the virtual machine. For example, accessing its configuration, taking snapshots (snapshot). A snapshot of a virtual machine is a snapshot of its state, it is a snapshot that allows you to that point, pause, restart, etc.
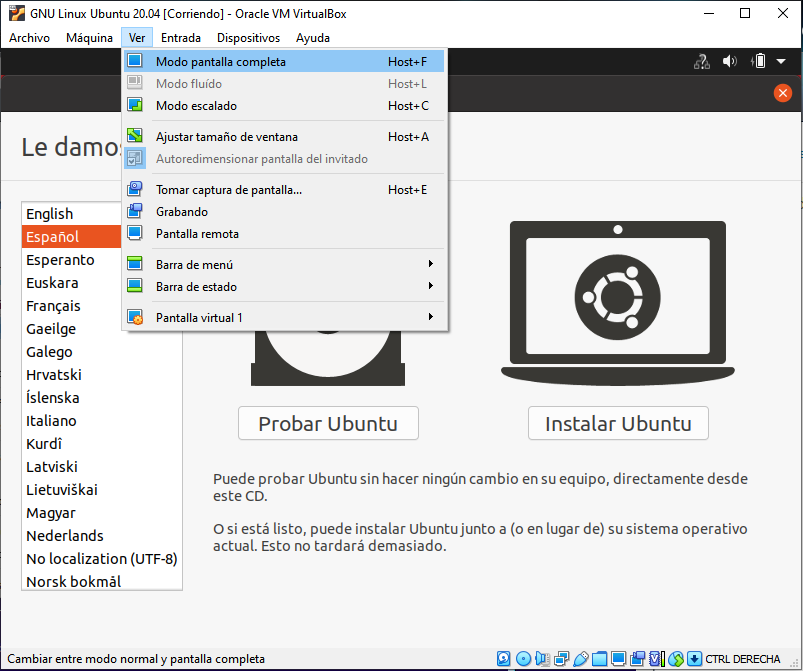
The “View” menu shows the options for viewing the virtual machine screen (Full Screen Mode Ctrol+F, Fluid Mode Ctrol+L, or Scaled Mode Ctrol+C). It also allows other options such as taking photos of the screen, recording videos, etc.
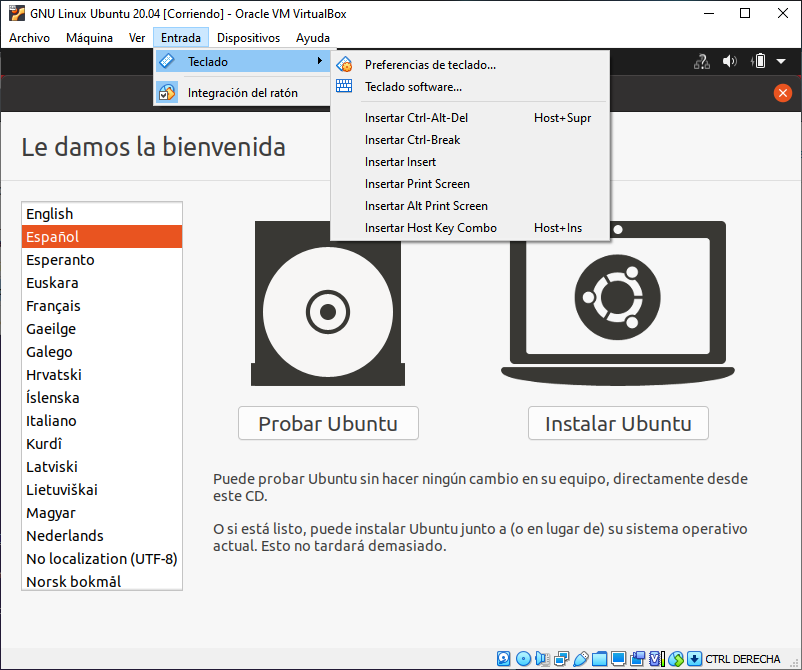
The input menu is limited to keyboard and mouse options to interact with the virtual machine.
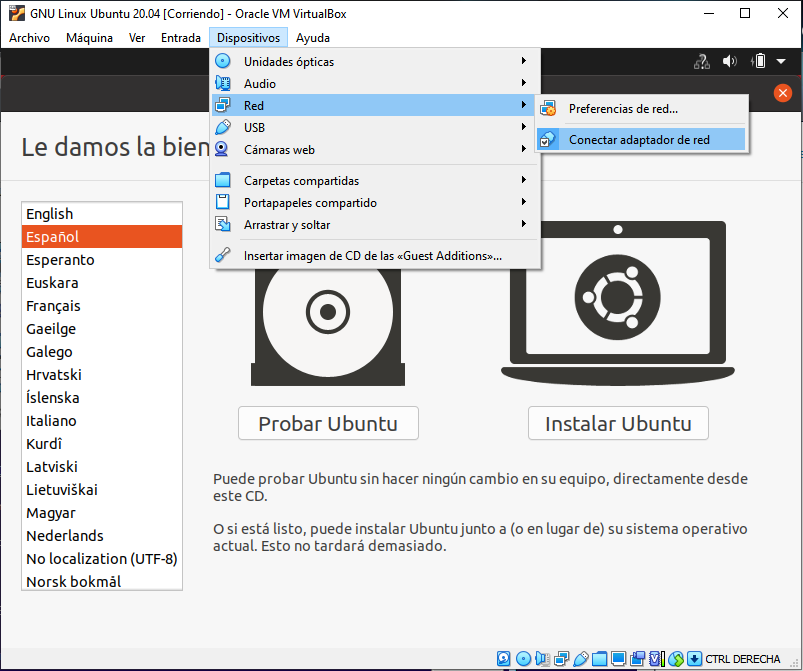
The “Devices” menu is one of the most important and most used; It allows the management of connections from physical devices to the virtual machine. After, in the last option “Insert Guest Additions CD image” is very essential, which allows you to put the VirtualBox drivers CD in the VM. Yes, friends, when VirtualBox emulates a machine it is emulating hardware and all hardware needs drivers for the operating system to work correctly on it.
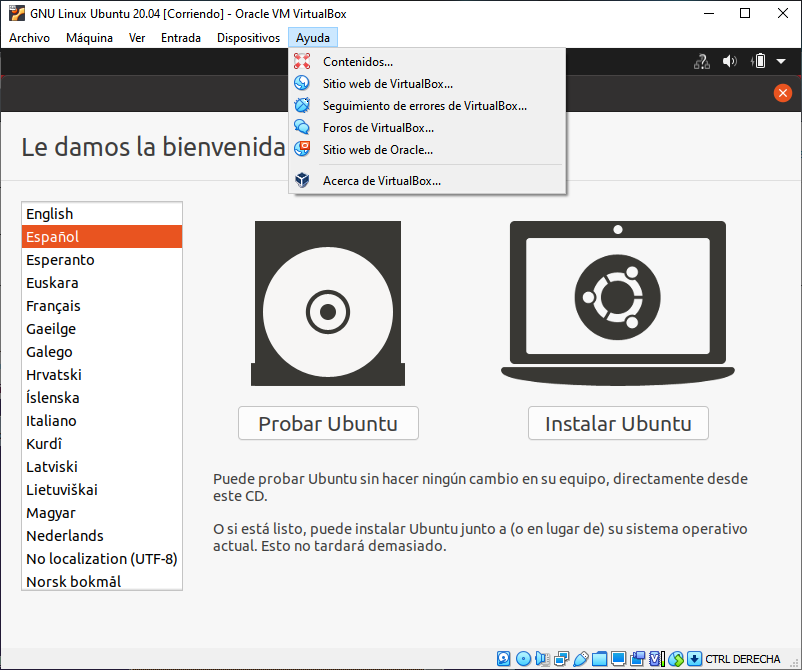
We also have a help menu in which we see access to online help. Additionally, data about the version is displayed in the last option.
At the bottom of the virtual machine window, a bar appears showing some options already configured. These allow you to secondary click on them to connect or access some options more directly.

That’s it for this tutorial on creating and configuring a virtual machine in VirtualBox to install GNU Linux Ubuntu 20.04 on it. I hope that you, dear reader, have understood and learned from it. If you have questions, you can leave a comment or join the Universo Digital Telegram group.
You can continue with the article Installing GNU Linux Ubuntu 20.04 step by step.