A very important element in our computers is the Operating System (OS). Everyone uses it, but really how many have stopped to install it from scratch or know how to do it? In this article, we are going to show each step of the installation and explain the details of interest or key points of the installation of Microsoft Windows 10. Without further ado, let’s begin.
To install an OS, you need installation media. This can be an installation CD/DVD, a USB memory, booting the computer over the network using a server, etc. There are several boot methods that exist to install a PC, we will be analyzing these in another of our articles. Starting from any installation medium, we will reach a common point. No matter what route we use; That common point is the installation program, which is what we will see in this article.
Microsoft Windows installation process
Once our computer starts using the medium that will be used to install, the first screen to be displayed is the following.
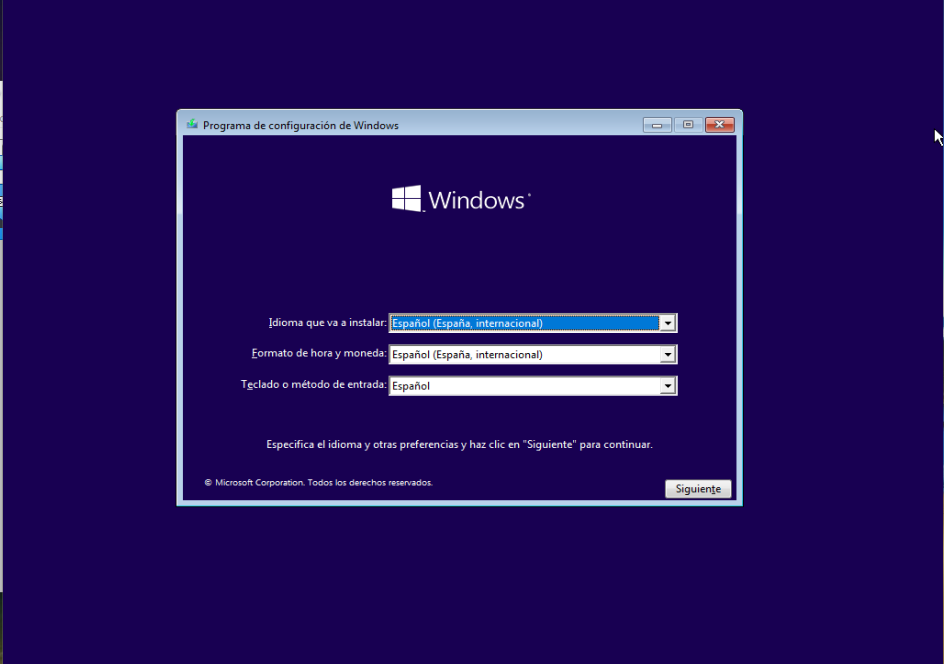
This screen shows the options to choose the language in case the installation media we use supports more than one. We must also select the date and time format and the keyboard input language.
It is of utmost importance that we always read and understand all the information that the installers show us. It depends on this that we select the correct options.
The second screen displayed in the Microsoft Windows installation is the one we see below.
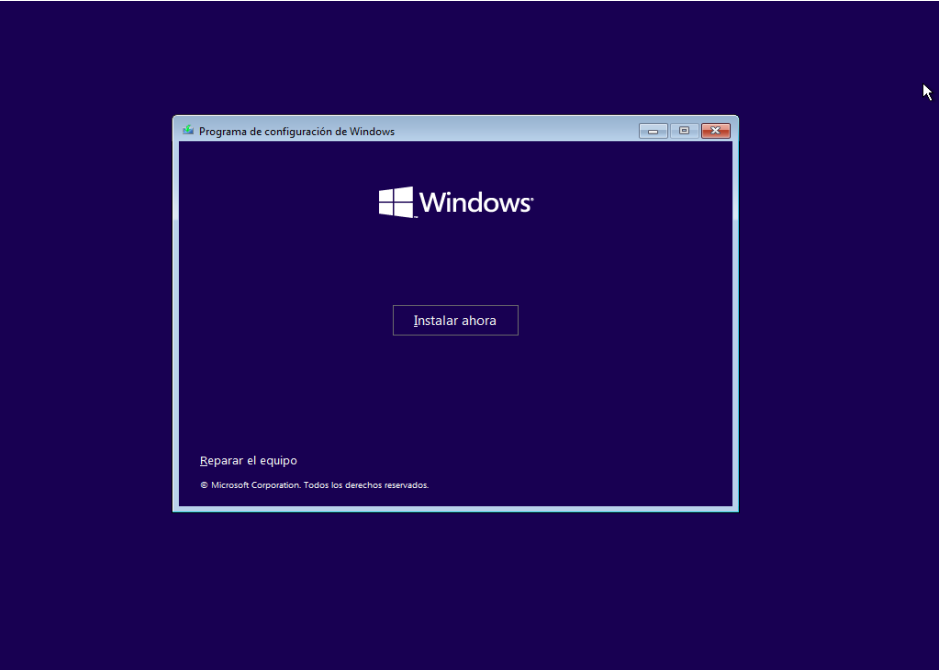
On this screen, there are only two possible options: click Install now (or press enter), or click on the option that appears in the lower left corner that says Repair your computer. This option is used to attempt to repair an older system that is damaged. In our case, we select the first option, because we are going to install the operating system.
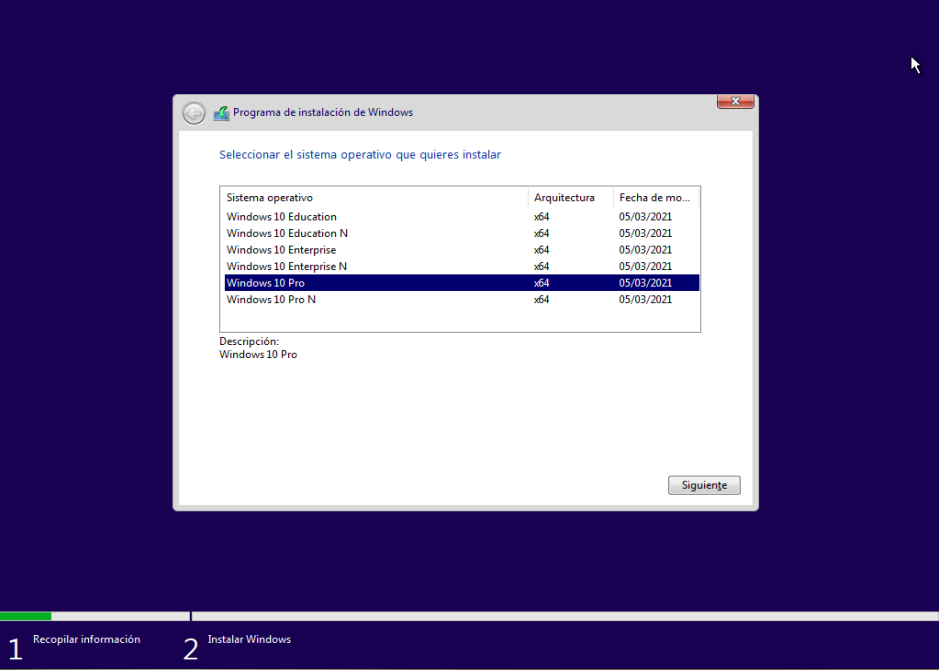
Next, the screen appears to select which version of the operating system we want. It is possible that on some computers this screen does not appear because they come with pre-installed systems from the factory, and you have to do a trick to get this screen to appear. That will be the subject of another article. In this article we will decide the 64-bit Windows 10 Pro version, note that it is without the N as shown below.
Next, this screen appears, informing us of the software license terms to which the Operating System we are using is subject. To continue, we must accept, checking the checkbox and clicking on the Next button, as shown in the image.

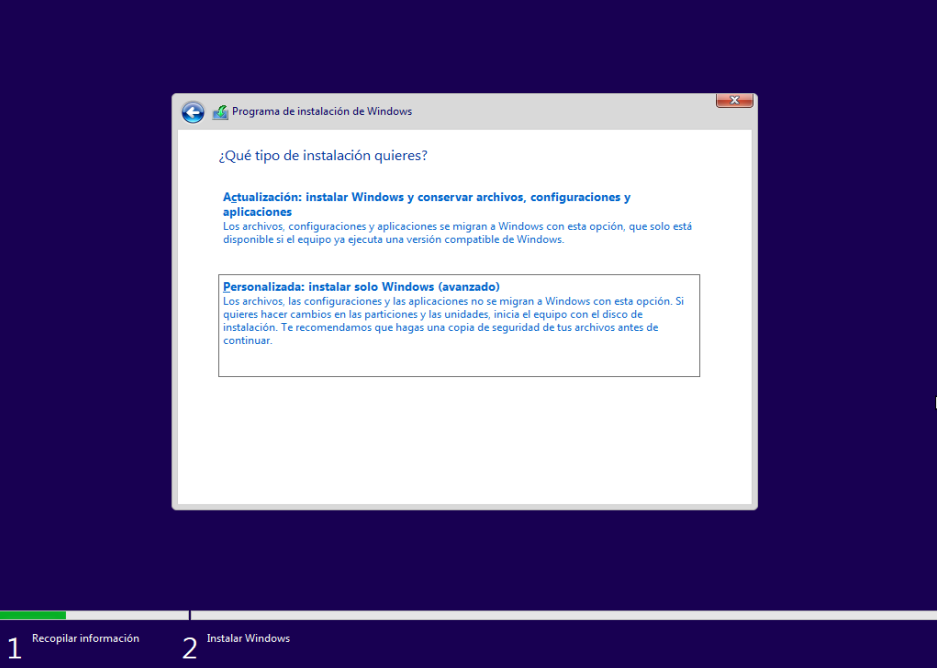
Then the following screen is displayed, it shows us two installation options. The first is to update if there is an older Windows system installed on the computer. The second option is to do an installation from scratch, which is what we are doing in this article.
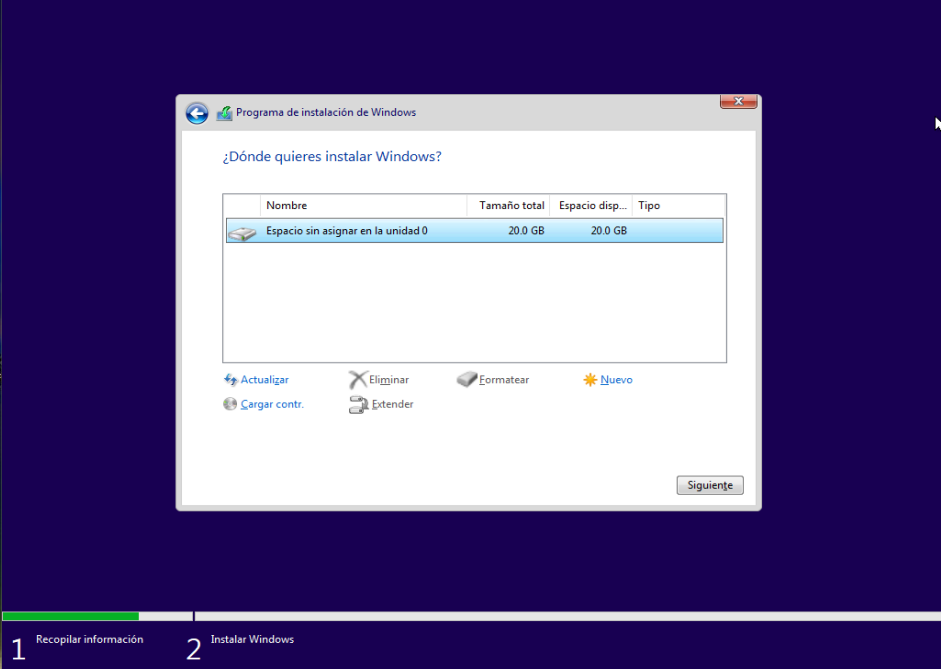
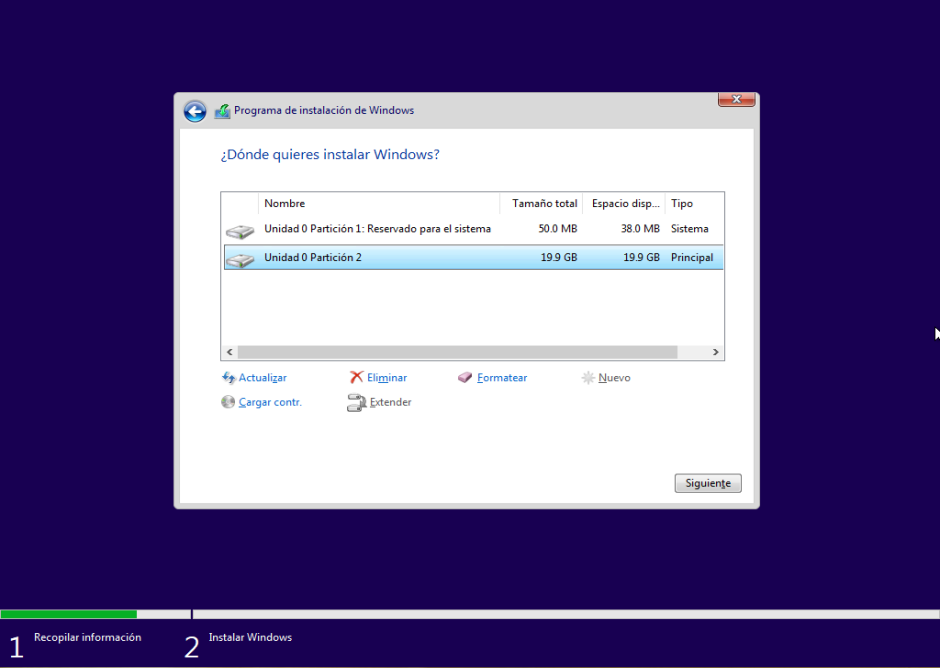
At this point, we will select where the operating system is going to be installed. This window should show all the hard drives we have with their respective partitions. We must keep in mind that Windows is recommended to always install on the first hard drive in a primary partition, that is, assuming there are more disks and partitions.
If we want to delete a partition, we can select it and use the delete option. It may also be the case that upon reaching this screen, no hard drive is shown. It is possible that we have to insert some media (CD/DVD, USB) with the drivers and search for them using the icon in the lower left corner. If you have only one hard drive, and it is completely empty or new, we can continue creating a new partition. To do this, we click on the New option as shown in the image below.
Once we have clicked on New, a box will appear to specify the size in megabytes of the partition where the system will be installed. For an average user, this size should be at least 30 gigabytes for the operating system partition. In the empty space, we can take advantage and create another partition to use as storage. Once the changes have been made to the partitions, we must select the partition where it will be installed and click the Next button.

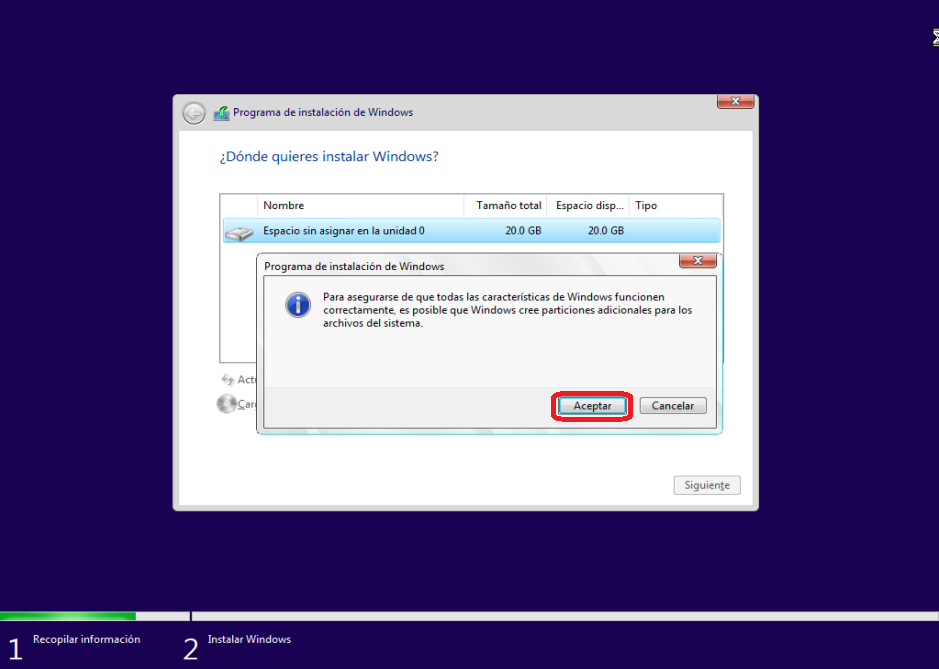
If there are no partitions on the disk, a window will appear showing a notification as shown in the image below, we choose to accept and continue.
Then we select the partition where it will be installed and click Next.
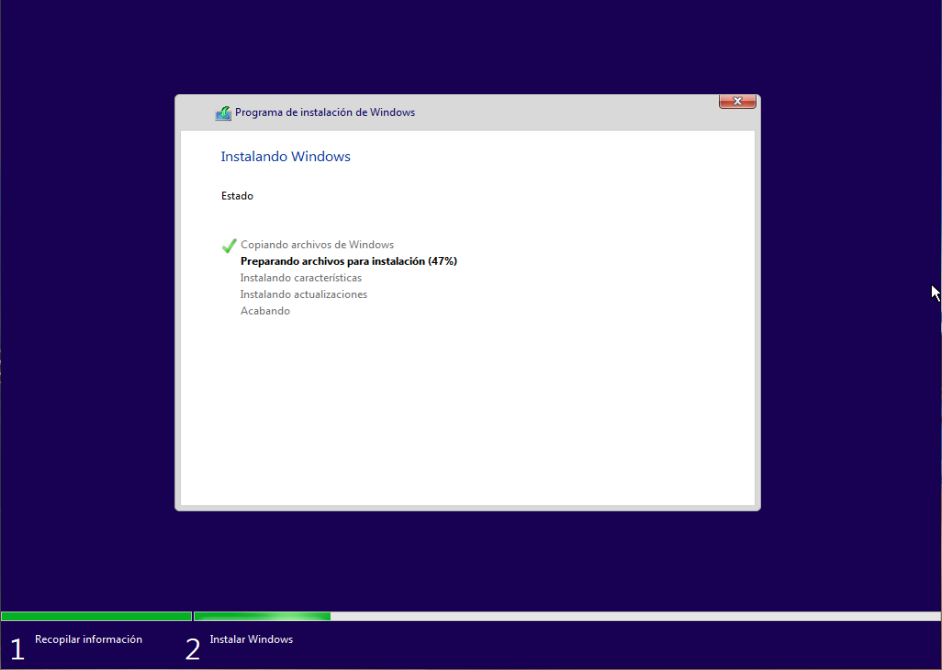
At this step, all that remains is to wait a little while the system installation is carried out. The computer may restart, but we should leave it and wait for the automated installation tasks to finish.
Microsoft Windows setup process
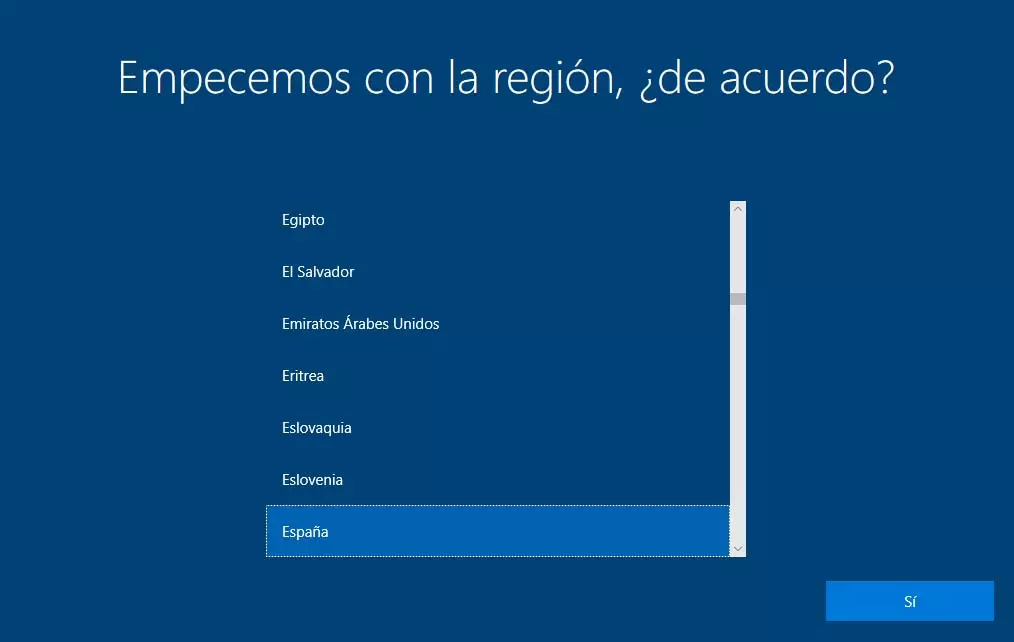
Once the installation of Microsoft Windows has been completed, a screen will appear asking us to select the region (country) we are in, select it and click Yes to continue.
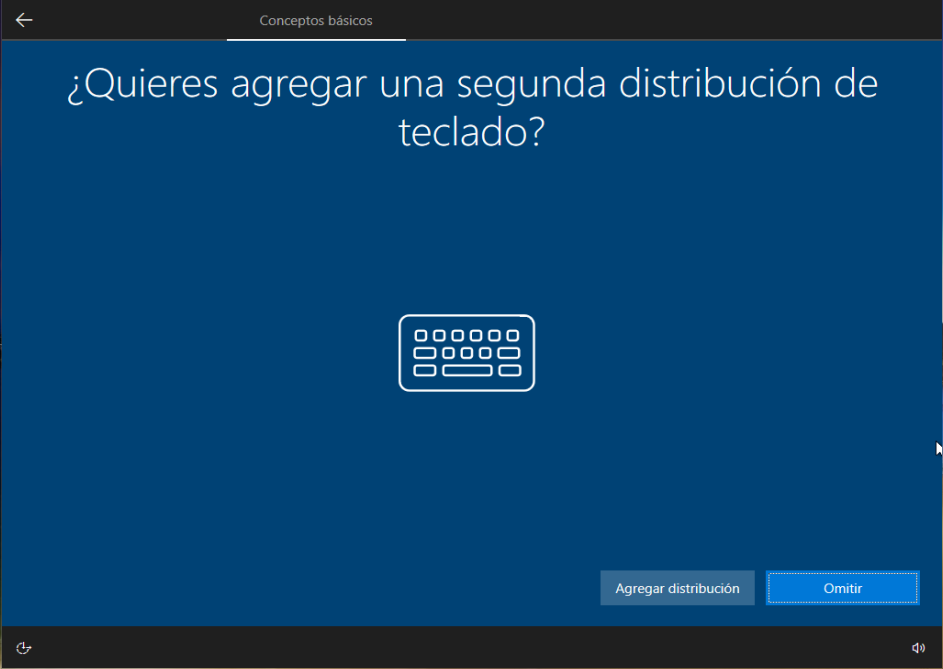
Subsequently, a screen is displayed to select the keyboard layout to use, we select the option that suits us and click Yes to continue.
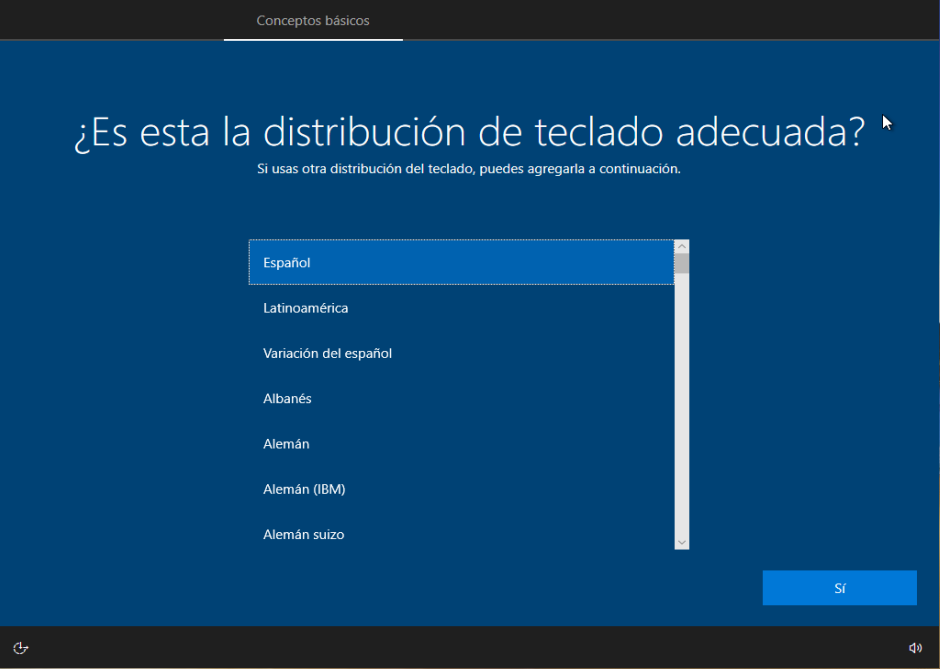
In case we wanted to add more than one keyboard layout, we can click on the Add layout button or else click on Skip.
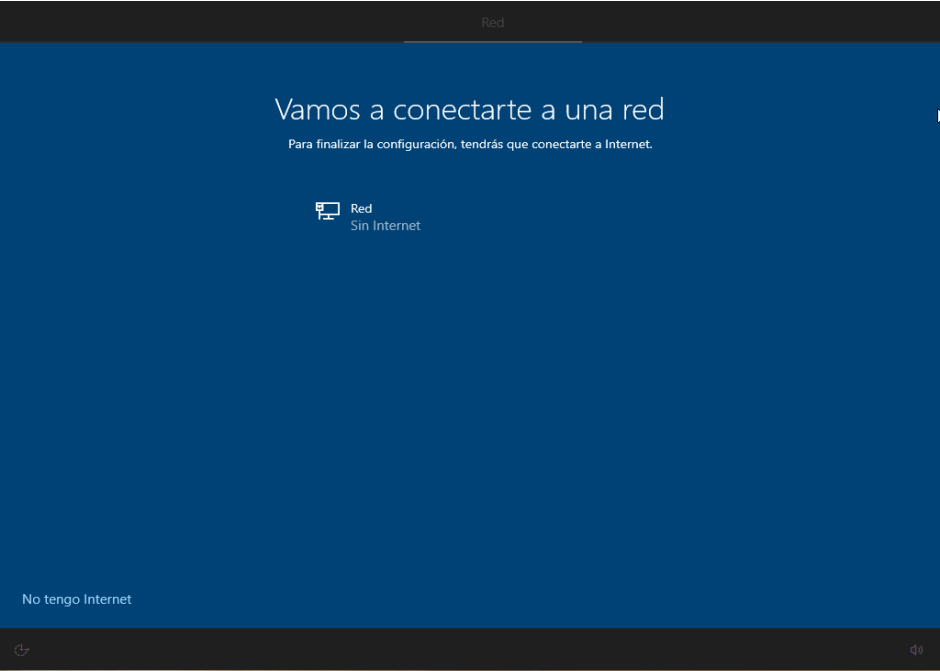
An important recommendation: during the installation of the operating system it is advisable to remove the network, that is, proceed with the installation without internet. This way we avoid possible update attempts, which are they fail can render the system useless, and we would have to reinstall it completely again. These updates can be applied later when the system is already functional. So our recommendation is to remove the connection to the device and select I don’t have internet option in the lower left corner to continue.
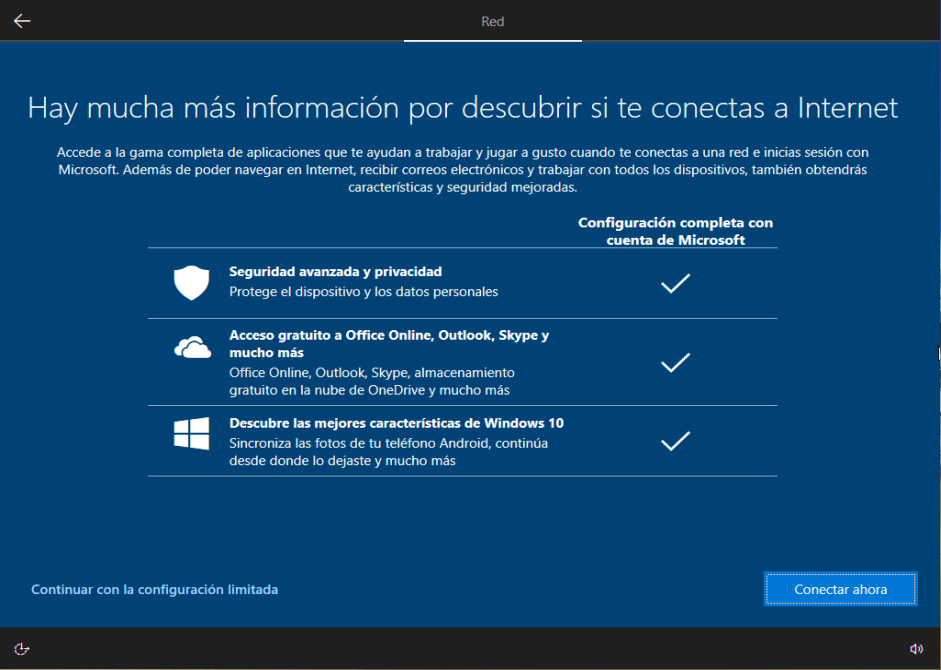
Upon reaching this screen we continue choosing the option in the lower left corner “Continue with limited configuration ”
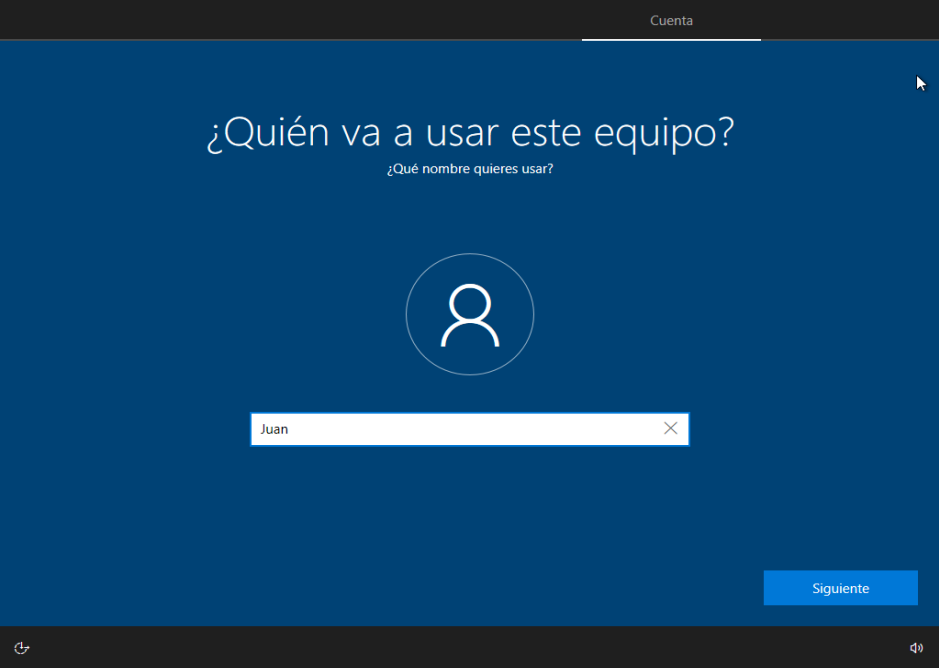
On the next screen the installation will ask us for the name of the person who will use the equipment, here we can enter our name and click Next
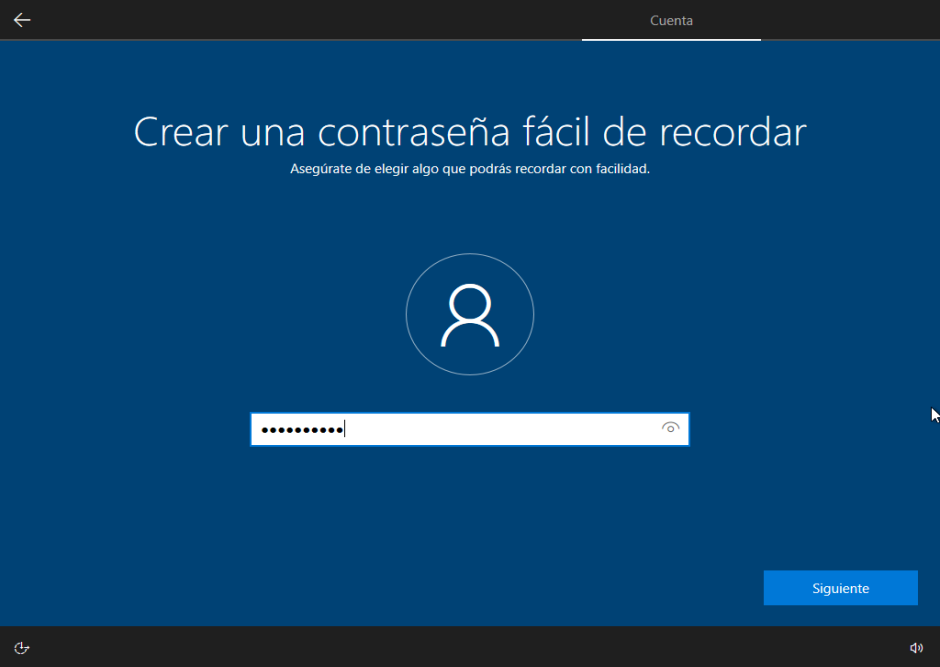
The next thing that the installation requires is a password, which is the one that will be used to enter, there we can put the one we like the most. We must always try to use strong passwords (more than 8 characters, letters, numbers, capital letters and signs) because the security of the system largely depends on that password. We can change this password later.
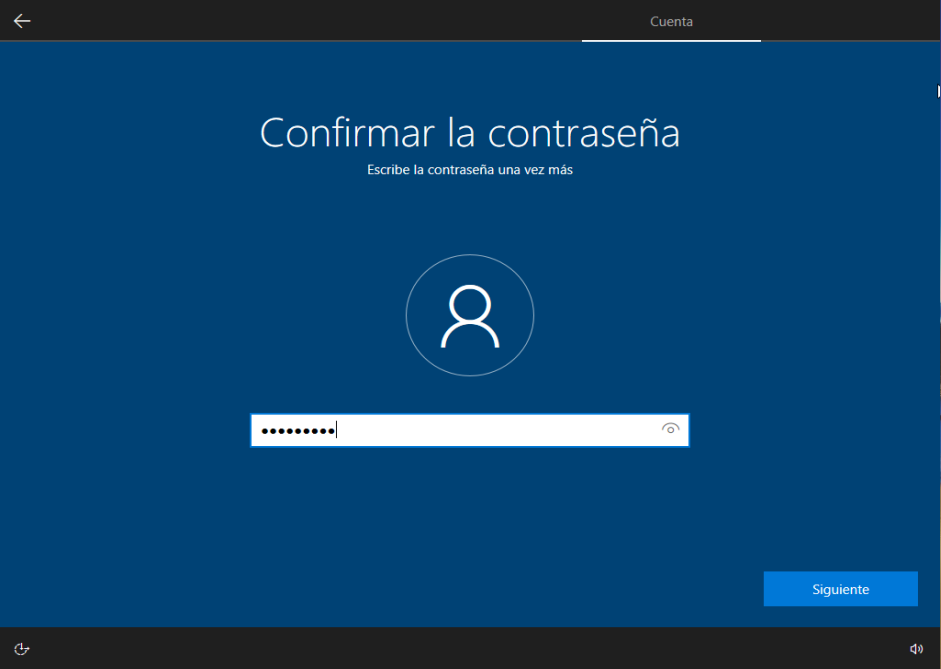
On this screen, we re-enter the password that we specified on the previous screen and click Next.
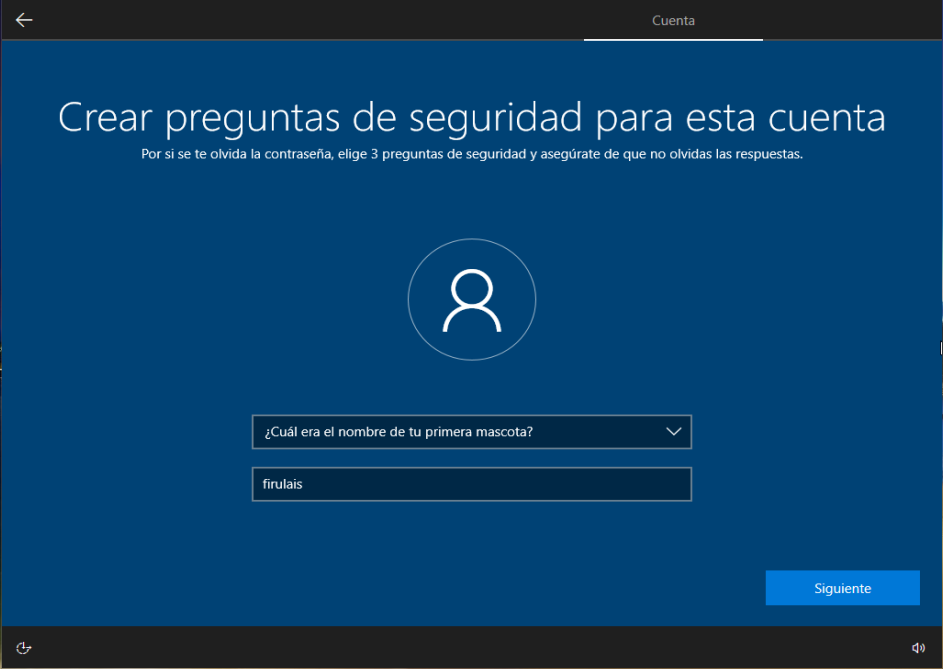
Once here, the system will ask us to decide 3 security questions and an answer for each of them. These are used to recover access to the PC if you forget the password. Hence, the importance of answering them without forgetting the answer. We select the question from the drop-down list and enter the answer we want below. Be careful, it is not mandatory to answer them correctly, just do not forget the answer you enter.
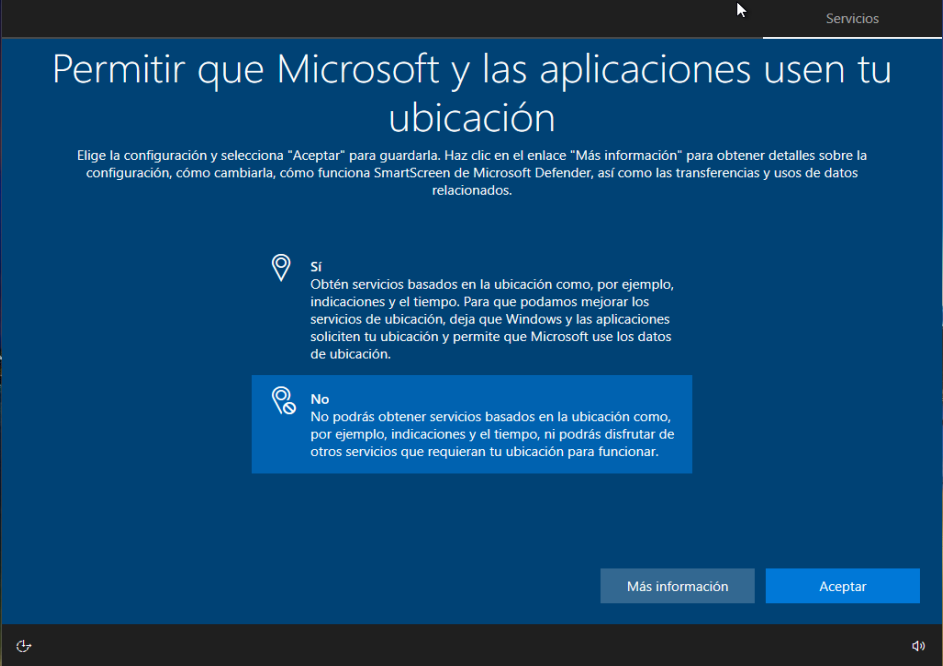
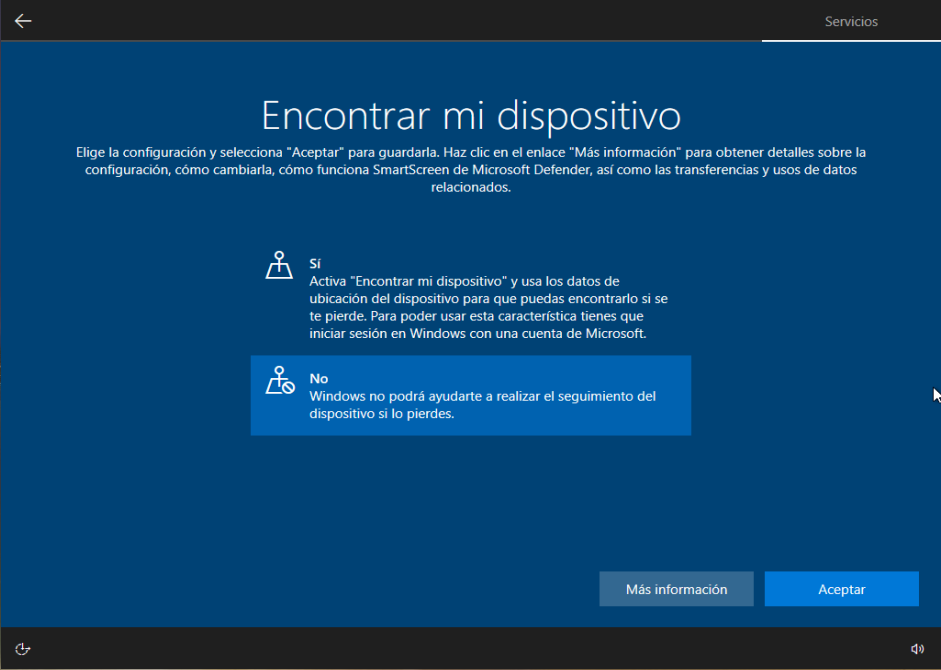
We are almost done with the installation of Microsoft Windows. You just need to configure some more details that are optional. In this way, my dear user, select as you like and click OK.
Like the previous step, select and Accept.
Same as the previous step, choose and Accept
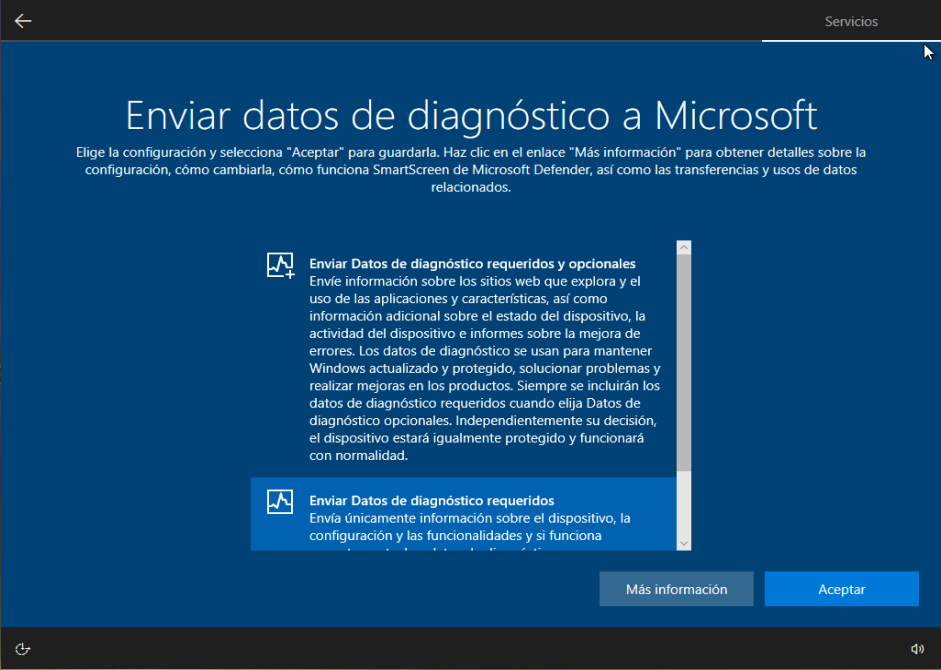
Like the previous step, select and Accept.
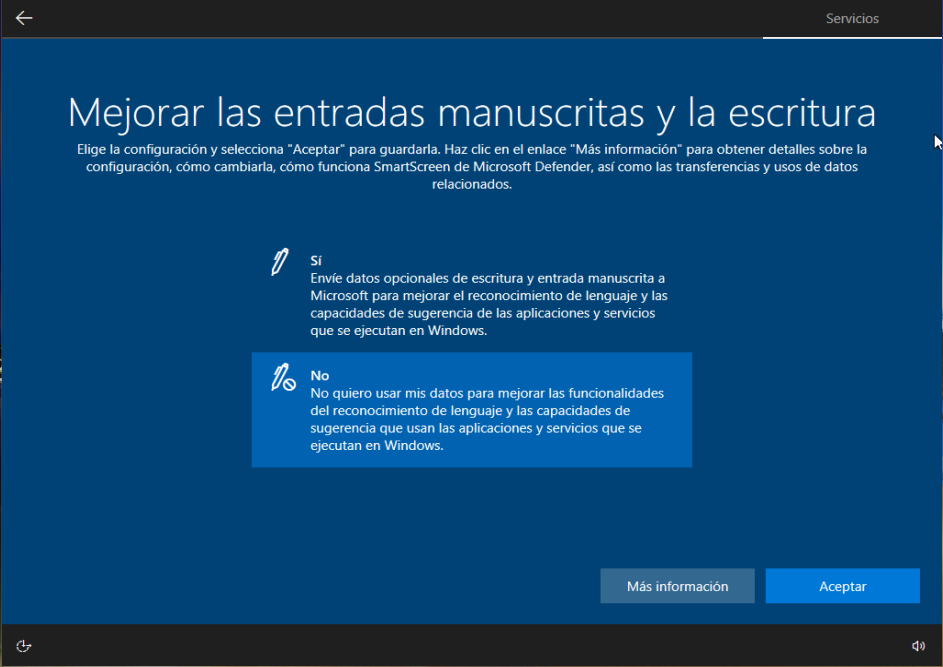
Same as the previous step, choose and Accept
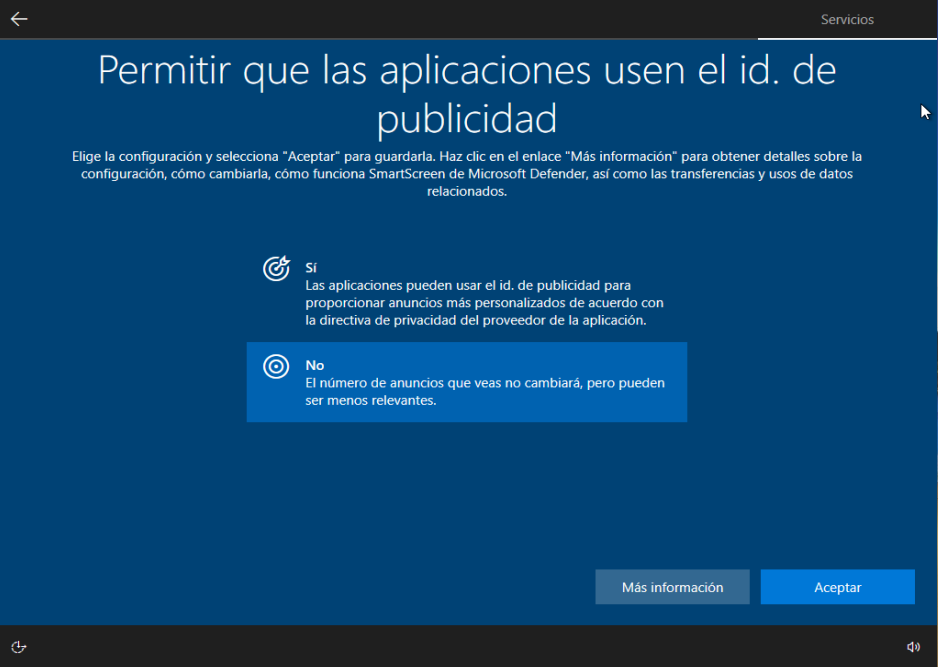
It is the same as the previous step, select and Accept.
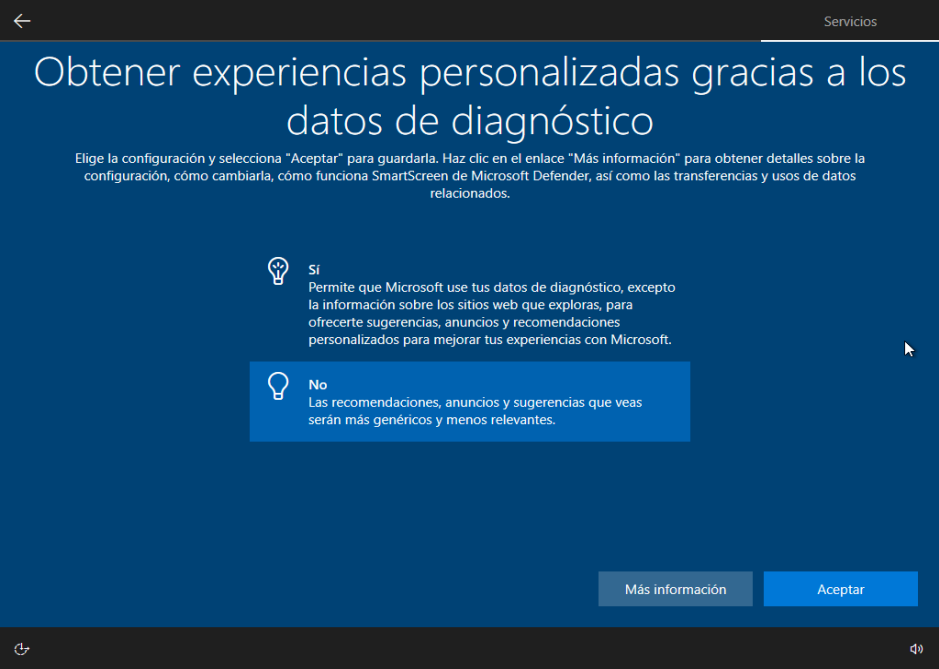
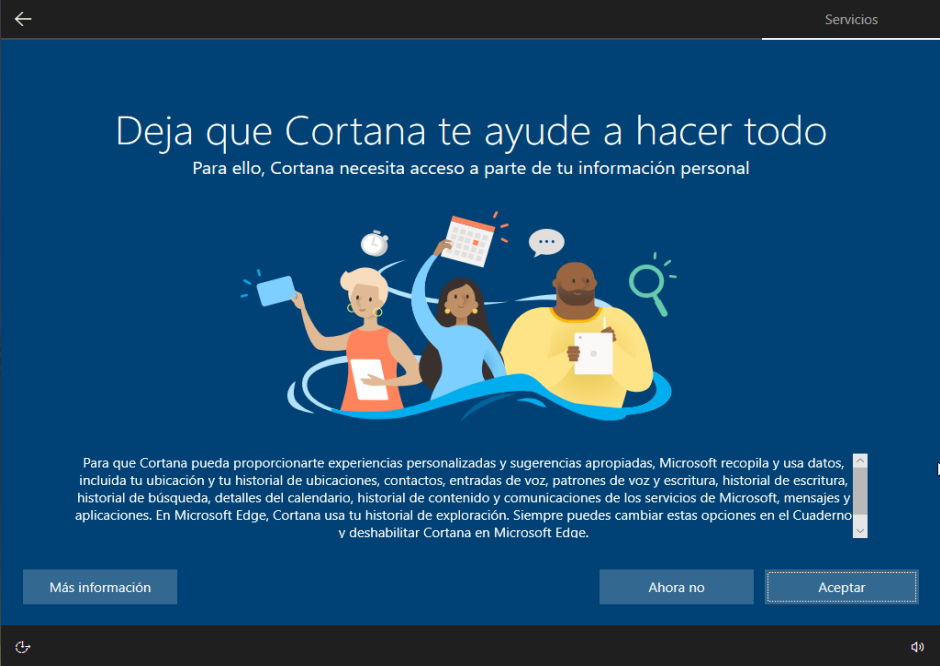
This is the last option, if you have a permanent internet connection, and you like Cortana, Microsoft’s online assistant, you can select “Accept ”. If on the other hand, you do not have much internet, or you do not like the assistant, you can select the option Not Now.
All you have to do is wait a little bit and the Microsoft Windows 10 Pro version desktop that you just installed will appear.
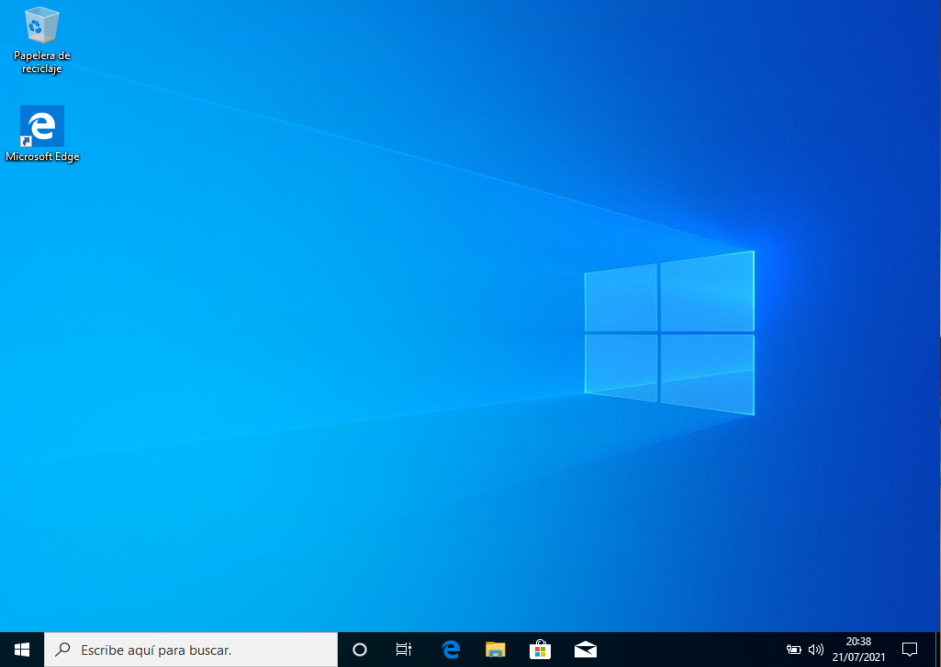
At this point the installation of Microsoft Windows is complete, it is very easy! And it is very useful that we know how to do it, since if our hard drive is damaged, and we buy a new one we will have to install the operating system and apply everything seen in this article.
From here, the next step is to install the hardware drivers. If you don’t know what they are, you can also see our article on Hardware Drivers.
You can leave your questions or suggestions in the comments, or join our Telegram group to discuss among more people.